Thursday 30 August 2012

Chickpea and Asparagus Frittata


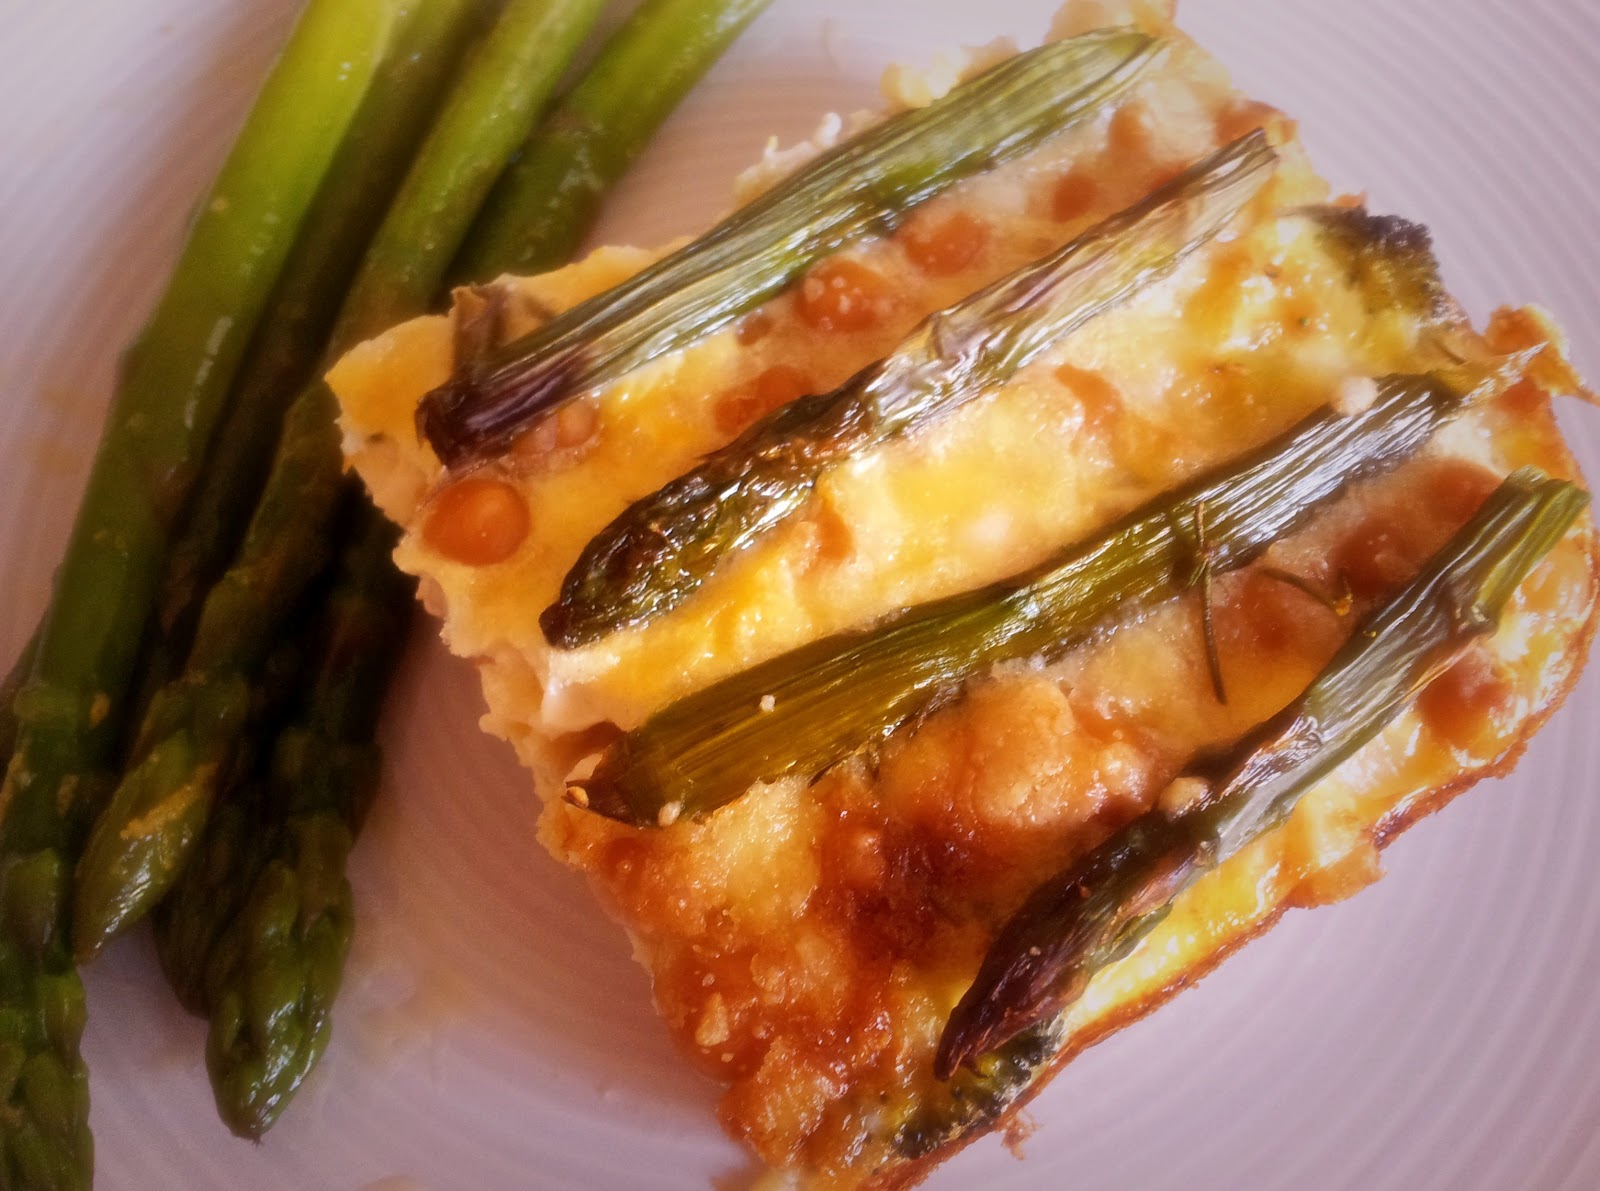
Chickpea and Asparagus Frittata with sauted lemon asparagus

What to do with an abundance of asparagus (and a few egg whites left over from my Lemon Curd and Raspberry Crumble slice)...

I also needed a quick and easy, light dinner tonight as daughter Summer and veggie daddy are off to Dad’s night at kinder this evening.  This dish is great on it's own but tonight I simply had so much asparagus that I blanched some for only 1 minute then tossed in a little olive oil, lemon zest and salt and pepper. Simply gorgeous!

It’s the kind of dish you can use whatever vegies you have on hand but I like pumpkin for comfort, chickpeas for added protein, asparagus for a reminder that spring is on the way and some rosemary and Romano cheese for a delicious flavour boost.  Other vegies that go well include zucchini, sweet potato, capsicum and even mushrooms.  While I often roast the pumpkin to enhance the flavour it’s also nice lightly boiled or steamed to make a softer dish which the kids tend to prefer.  My eggs are free range from my local farmers market which I now get by the tray full.  Summer loves returning each week to recycle our carton or tray from the “egg man”. 
  
It was grandma who brought us the bunches of asparagus and even Summer couldn’t wait to eat them and had some for lunch. I don’t know about your family but we’re a little divided about the effects of asparagus particularly regarding the smell of one’s urine.  We all love the taste and while myself and Finn have no complaints, it’s daddy and Summer who have almost immediate effects.  Apparently it’s a genetic thing that you either have or you don’t. 


Anyway, here it is...

Chickpea and Asparagus Frittata

50g Romano or Parmesan cheese
5 free range eggs
100g milk
Chickpeas (1 tin or 200g dried and cooked)
1 bunch asparagus (with tough ends snapped off)
Approx 300g potato and pumpkin cut into 2cm pieces
Approx ½  broccoli chopped
Salt and pepper (optional)
Fresh rosemary
  • Lightly steam or boil potatos and pumpkin adding broccoli for the last few minutes
  • Place in a 20cm x 20cm baking dish and sprinkle chickpeas over
  • Place cheese in Thermomix bowl and grate for 10 seconds speed 8.  Remove half and set aside
  • Add eggs and milk and blend 20 seconds speed 4
  • Pour over veggies, arrange asparagus spears on top and sprinkle with remaining cheese
  • Bake 180° 35 mins until golden and only just set.
Enjoy!

Monday 27 August 2012

Cavolo Nero, Mushroom and Capsicum Rice Bake

I love my greens…. the darker the better!

That’s why I love this recipe with Cavolo Nero or Tuscan Kale as it’s also known.  You could just as easily use other forms of kale, silverbeet or spinach and it would be just as delicious and nutritious.  In fact Cavolo Nero is a great source of many vitamins and minerals as well as sulforaphane (particularly when chopped) which has potent anti-cancer properties.

Cavolo Nero
This is a variation of a recipe by Jude Blereau in her fantastic book called “Wholefood for Children” adjusted a little to add more colour and for the Thermomix.  I also used a bit more brown rice to make it go a bit further.  I simply love brown rice and the nuttiness it adds to dishes like this.  The addition of amaranth increases the protein of the dish and in fact it is 30 per cent higher in protein than rice.

I used some lovely Swiss Brown mushrooms but button mushrooms work fine too.  And the tomatos I found at my local fruit and vege shop today were local mini black tomatos.  So sweet and cute, the way the kids ate them I was lucky there was any left for the dish.  And the best part is the kids simply devour this when we have it for dinner.  It’s super tasty and easy to digest particularly by soaking the rice first (note this step is optional).  It also makes great leftover’s and as grandma has reported is great in a toasted wrap the next day!

 
Cavolo Nero, Mushroom and Capsicum Rice Bake
 
200g brown rice
2 tbls amaranth
1 tbls lemon juice
40g Pecorino Romano or parmesan cheese
Approx 200g Cavolo Nero (thick stems removed)
1 onion
1 clove garlic
20g olive oil
100g Swiss Brown or Button mushrooms
50 g red capsicum
250g ricotta
2 eggs
3 or 4 cherry or grape tomatos sliced
30g pine nuts
Pepper to taste

  • Combine brown rice, amaranth and lemon juice in a small bowl and add just enough water to cover.  Let soak for 6 hours or overnight to increase digestibility and reduce cooking time.
  • Place 800g water in Thermomix bowl, insert basket than add rice mixture including any excess water.  Cook for 30 minutes at Varoma temp on speed 4. Set aside and empty water from bowl.
  • Add pecorino to TM bowl and chop 8 seconds speed 9.  Set aside
  • Add Cavolo Nero to TM bowl and chop 3 seconds speed 7.  Set aside (I placed it on top of the warm rice to lightly steam)
  • Add onion and garlic and chop 5 sec speed 7
  • Add oil and sauté for 2 minutes at 100° on speed 1
  • Add mushrooms and capsicum and chop 3 seconds speed 6.  Saute 1 minute at 100° on speed 1
  • Add eggs, cheeses, pepper and combine 5 seconds speed 4
  • Add Cavolo Nero and rice and combine on Reverse 5 seconds speed 4
  • Pour into a 20 x 20cm baking dish
  • Cover with tomatos and pine nuts and bake 180° for approx 40 minutes until set.

Enjoy!

Saturday 25 August 2012

Children's Birthday Cakes


This is a retrospective post, and not about the healthiest of family food, but one I simply must share.  While the creative flair of motherhood has taken many journeys from sewing, knitting and even scrapbook paper types of decorating, I never thought I’d try cake decorating.   I guess until it came to my own kids birthdays.

 
I wasn’t until Summer’s 3rd birthday that I gave it a real go.  She wanted a fairy garden party and a cake to match.  After what seemed hours of internet searching and creative visualisation I came up with the plan.  A green garden filled with colourful flowers, butterflies, ladybirds, leaves, toadstools and of course a pretty fairy on top.
 
The cake itself was Summer’s requested chocolate cake and the icing was buttercream with fondant decorations.  I found a fantastic buttercream recipe for the Thermomix at Gastronomy which includes copha so it holds well in warm weather and is great for piping, etc.  I’m a little reluctant to use food colouring so the colours are quite light on this cake (but watch this progress in subsequent cakes!)

Summer was delighted in her cake and the requests for further cakes rolled on from here….


The next cake was my niece Layla’s 3rd birthday.  She was having a ballerina party so I had the perfect cake in mind.  A more formal design something like I remembered from the old Women’s Weekly Children’s Cakebook.  Pale pink with dainty ballerinas.  It was a basic buttercake inside made as always in the Thermomix but my favourite part was the layers inside.  Three layers filled with pink buttercream so it looked really pretty when sliced.
 
My assistant in the kitchen Miss Summer!
 Again, another happy little customer….


The third cake was more Finn’s 1st birthday and we went with a theme that suited him and his name.  A beach scene with a dolphin in the waves and a retro surfboard on the beach.  And this cake was my favourite.  An Orange and Chocolate Almond cake.  Quite rich yet not too heavy but just devine in taste.  And the colours of the chocolate was set off well by the blue icing (and notice my depth of colour getting a bit heavier!)

 
From here the latest creation was from a friend’s little girl Alexis’s 3rd birthday.  Her request was a Dora cake with a strawberry and cream filling.  I could envisage the design immediately.  Bright, bold colours (way heavier on the food colouring than I’ve ever dared to go!), with flowers and colourful dots for Dora to explore through, with Map of course.  My biggest worry was the strawberries and cream inside and would it stay fresh if I made the cake the day before.  With some trusty internet searching my fears subsided and the outcome was just fine. 

Another happy birthday girl!

Tuesday 21 August 2012

Veggie Focaccia

So who said it's too cold to go to the beach in winter...
Finn at the beach

This morning Summer (maybe it's her name that blew away the winter chills) said she wanted to go swimming at the beach.  So how could a surfing mum and dad say no.  With wetsuits adorned and little Finn rugged up in warm clothes we headed to our local beach for a fun splash and play in the sand. 
Summer and daddy  - so brave!

We had the beach to ourselves and while the rain and wind visited for a little while, it wasn't long before the sun shone.  The kids dug a hole on the sand and as it was low tide they had the perfect little splash pool.  It was rather balmy!


An hour later we dragged the kids home for a warm shower and a fresh focaccia for lunch.


As you will get to know, we rather like homemade bread in our house.  Fresh bread straight from the oven and our weekend favourite at the moment is focaccia.  We find the recipe from the Thermomix EDC works well with a variety of toppings.  Sometimes just rock salt and rosemary from the garden, otherwise a scatter of home cured olives works a treat.  It’s hard to resist fresh bread straight from the oven with butter, nut butter or even just on it’s own.  If we can wait we’ll fill with variety of veges such as roasted capsicum, eggplant, pumpkin, baby spinach and pesto and feta.  Sometimes veggie daddy will cook some homemade chips while the oven is on (sweet potato are my favourite) and we all agree this is better than going to a café for lunch.


Mushroom and Spinach Omlette

I feel like a big kid at Christmas.  I got my second Thermomix bowl delivered today and I’m super excited! As fellow Thermomixer’s know, these knifty little machines can be very inspiring and it’s easy to have several creations on the go at once.  It was actually veggie daddy who suggested I get a second bowl after I recently catered for our son's 1st birthday / christening and made an indian feast for my birthday.  To be efficient with one bowl you need a certain amount of planning, ie doing all your grinding or milling at once to be time effective, or sequencing your dishes to minimise washing between.  So now with a second bowl, does it mean I can make twice as much…


Mushroom and Spinach Omlette with toasted olive bread

Speaking of time efficiency, this recipe is super quick, healthy and most importantly tasty.  It’s easy to whip up for a breakfast, lunch or dinner and is flexible with what toppings you add.  I  simply love the way the Thermomix beats egg whites making recipes like this failproof.  It is so light and fluffy that's it's too thick to fold in half and is more pizza style.  I used 6 eggs for a family of four and a large frypan but this could easily be reduced to suit.  In fact I’m leaving the recipe quite open and as a guide to your imagination…

 Mushroom and Spinach Omlette

Preheat oven or grill to 180°.

Grate approx 50 grams cheese (I combined tasty and swiss) 6 sec speed 8 in TM and set aside.

Wash and dry TM (or use 2nd bowl if you have one!)

Slice a handful of mushrooms and lightly sauté with a little butter, fresh herbs and pepper in a non-stick frypan.  When starting to brown, add a good handful of baby spinach until just starting to wilt.  Remove from pan and set aside.  I find doing this first in the same frypan ensures it’s well heated and seasoned for the omlette. 

Separate 6 room temperature eggs and place egg whites into clean TM bowl. 

Insert Butterfly and beat without MC for approx 3 minutes 50° speed 4 (wow!)

Reduce to speed  2 and drizzle in egg yolks for about 5-6 seconds or until only just combined and without sacrificing those gorgeous egg whites.

Pour into frypan and over medium heat cook about 5 minutes until edges start to cook.

Sprinkle mushrooms, spinach and cheese over top and grill for another 5 minutes until cheese is melted and omlette is only just set.

Serve with your favourite Thermomix bread or salad and enjoy!

Summer waiting for breakfast


Sunday 19 August 2012

Healthy Wholesome Muesli


For the first time since having my 2nd child (over a year ago) I had the day at home to myself.  Veggie daddy took the kids to the inlaws for the entire afternoon.  I spent the morning baking cheese and pesto scrolls, cutting up fruit, packing homemade banana biscuits and other snacks to keep their tummies happy not to mention spare clothes and nappies.

I had a list of things to do while they were gone but my main purpose of staying home was to get some posts written for you all to read… Well they’ll be home soon and I haven’t written much, but I have done plently of baking!

I have to admit that I struggled being on my own in the peace and quiet of home.  It was different than being at work which has a sense of purpose and I know the kids are home happily playing with Grandma or daddy.  But I managed to get those jobs done that can be more challenging with the kids, wash the floor, dusted their rooms, even went for a quick run.  But most importantly I cooked.  I made some gourmet muesli, high protein nut butter, prepared jars for my curing olives (didn’t get around to filling the jars), then finally dinner for tonight, a hearty vege shepherdless pie.

So lets start with the muesli first...


For many years I tried different types of gourmet muesli.  Sure most are delicious but they’re not something that can be eaten daily as often have added sugar or fats (and often cost the earth!).  Finding that perfect combination of grains, fruits and nuts which you won’t get bored with is the next challenge, not to mention the cost.  So in the past few years I’ve been making my own gourmet muesli.  The blend varies depending on what I have or feel like.  And if you like you could add coconut butter or honey before toasting to increase crunchiness or sweetness but I prefer without.


The muesli I made today was something like this…
Healthy Wholesome Muesli
3 cups rolled oats
½ cup amaranth flakes
½ cup quinoa flakes
½ cup chopped nuts (eg; almonds, hazelnuts)
½ cup shredded coconut
1 tbls cinnamon
½ cup seeds (eg; sunflower, pepitas)
1 cup chopped dried fruit (eg fresh dates, inca berries, goji berries, cranberries)
  • Preheat oven to 180°
  • Spread oats and cinnamon on a tray (drizzle with melted coconut butter or honey if desired) and bake for 10 mins
  • Spread nuts, seeds and coconut on another tray and bake 5 mins (be careful not to burn coconut which I was close to today – but I actually like it well toasted)
  • Cool before transferring to an airtight container to store
Serve with fruit, yoghurt and choice of milk.

Also great soaked overnight in apple juice Bircher style which makes the grains easier to digest.

Enjoy!

Thursday 16 August 2012

Sweet Potato, Chickpea and Millet Patties

Now my reason for writing is to share my vegetarian family's journey and this recipe does exactly that.  Believe it or not, I have never cooked with millet before.  I've used various types of quinoa, amaranth, spelt, cous cous and other grains but never millet.  And I love it!  And more importantly, so does the family. 
Sweet potato, Chickpea and Millet patties

This recipe is all about healthy, nutrient dense vegetarian food that serves our bodies, especially young growing bodies, well.  It is high in complex proteins, very low in fat and sodium, and most importantly tastes great. It also makes a large quantity so is great for entertaining or freezing. 

Hulled millet is best to use as the tough shell has been removed making it quicker to cook without any reduction in nutrients.  It has a mild, nutty flavour and is easy to digest so it's great for little tummies!  Millet is nearly 15% protein, is rich in fibre, B-complex vitamins and essential amino acids and contains some vitamin E. Millet is also high in minerals such as iron, magnesium, phosphorus, and potassium.  It's a versatile grain and in fact I cooked extra to make a tasty dessert for the kids mixed yoghurt and berries.

Millet grains

These patties could be served as a burger, with a light salad topped with yoghurt, or as we enjoyed them in the midst of winter, with Thermomix mashed potato, greens and rhubarb chutney.  Veggie dad loves his mashed potato, enough to lick the bowl clean.  Summer loves brussel sprouts (or fairy cabbages as we call them) and usually steals extras from dad.  And little Finn does a great job at self feeding brocollini (little trees).


Sweet Potato, Chickpea and Millet Patties in the Thermomix

600g water for steaming
100g hulled millet (can be soaked for 2-3 hours)
350g sweet potato chopped
180g chickpeas (soaked overnight and cooked or use 1 tin)
1 onion
1 clove garlic
1 carrot roughly chopped
1 zuchinni roughly chopped
1/2 MC sunflower seeds
1 tsp each cumin, coriander
1/2 tsp paprika, garam masala
handful of flat lead parsley or coriander

Place water in TM bowl and millet in steamer basket and insert
Place sweet potato in Varoma dish and cook 25 min Varoma sp 2 then set aside.
   (while waiting, prepare the other ingredients then play with the kids!)
Chop onion and garlic (5 sec sp 6)
Saute with 10g olive oil and spices (2 min 100° sp 2)
Chop carrot, zuchinni and sunflower seeds (4 sec sp 6)
Add chickpeas and mix (2 sec sp 6)
Add millet, sweet potato and parsley and mix until combined using spatula to assist (approx 30 sec sp 4)

Form into patties and coat in fresh breadcrumbs (I use frozen multigrain homemade breadcrumbs as shown in Everyday Cookbook)
Pan fry 5 minutes each side until golden.

Enjoy!

Wednesday 15 August 2012

Lemon Curd and Raspberry Crumble Slice

Lets start with something sweet........ yet for a good cause....

Lemon Curd and Raspberry crumble slice

A wonderful friend hosted a fundraiser high tea on the weekend for Cuppa for HeartKids Australia.  As her inaugural event it was a relaxing, intimate morning tea with a gorgeous group of girls. We drank tea in our favourite tea cups, ate delicate finger sandwiches and savouries, and most of all enjoyed an abundance of sweet treats.

My favourite tea cup

In order to raise money cakes were made and books and brand labelled clothes were donated for selling.  I had so many cake ideas to choose from but decided to try my first Persian Love cake.  And wow!  But I will try to contain my excitement about this treat until I make it for my sister's birthday in a few weeks....


As a sweet treat to share at the high tea I decided upon a Lemon Curd and Raspberry Crumble Slice.  My parents have an amazing lemon tree that is filled with the biggest, juiciest lemons year round and I had recently been given a lemon slice recipe from another great friend (the one who also gave me great pleasure in introducing me to my ... thermomix). 

Now as you will get to know I simply cannot stick with a recipe completely so I gave it a few tweaks.  The original was from delicious magazine, sounded devine and I had been looking for an excuse to make it.  Rather than store bought lemon curd, I made my own quick and easy thermomix version with extra zest which I include the recipe for soon (amazing on vanilla ice cream says veggie dad).  I reduced the sugar in the recipe and with the help of my budding chef daughter, sprinkled with raspberries.

And here is the result...


Lemon Curd and Raspberry Crumble Slice

Base:

45g raw sugar       
200g plain flour
1 tsp baking powder
160g chilled unsalted butter, chopped
1 egg yolk
2 tbls cold milk
approx 500g lemon curd (recipe to follow)

Crumble:

80g almonds (milled to almond meal)
50g plain flour
2 tbls raw sugar
50g chilled unsalted butter, chopped
1 egg yolk

Make the base...

Mill raw sugar to icing sugar (5 sec speed 9)
Add flour, baking powder and butter and mix until resembles fine crumbs (15 sec speed 6)
Add yolk and milk and use dough setting until mixture comes together (30 sec)
Turn out into a greased and lined lamington pan, firmly press down and chill for 30 mins.

Preheat oven to 180° then bake pastry for 30-35 mins until golden.  Cool in pan.

Meanwhile make the crumble...

Place almonds in Thermomix and mill (10 sec speed 7)
Add flour, sugar and butter and mix until resembles coarse crumbs (15 sec speed 6)
Add egg yolk and combine (5 sec speed 6)
Spread lemon curd over base, then scatter over crumble mixture.
Sprinkle raspberries over top.
Bake a further 25-30 minutes until golden.

Enjoy!