Showing posts with label cake. Show all posts

Monday, 26 January 2015

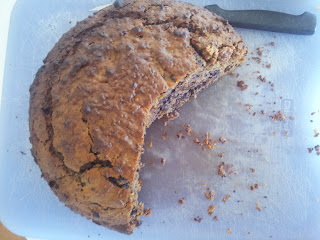
Chocolate Bourbon Cake


How crazy is this.  I have heaps of healthy and even baby friendly recipes that I'm trying to find the time to share.  Then I come out with this.  The opposite of 99% of my cooking. Not even any hidden kale or beetroot.  Just rich, indulgent, even a bit adults only. 

What else do you make for your brother.  A thirty something single guy who couldn't possibly celebrate his Australia Day birthday without a drink in his hand.  And he’s not even much of a cake eater so let’s see if this twists his rubber arm.   Fortunately for the kids the alcohol cooks out so even they can have a special occasion taste.


Chocolate Bourbon Cake

100g almonds
¼ cup SR flour
Pinch salt
½ tsp ground cinnamon
200g dark chocolate (70% cocoa)
120g butter
90g brown sugar
2 tsp vanilla
3 tbls bourbon or whiskey of choice
5 free range eggs

  • Preheat oven to 180⁰
  • Place almonds in Thermomix bowl and mill for 10 seconds on speed 9
  • Add flour, cinnamon and salt and mix for 3 seconds on speed 4 then set aside
  • Place chocolate roughly chopped in Thermomix bowl and chop on speed 6 for 5 seconds
  • Melt for 3 minutes at 70⁰ on speed 3
  • Add cubed butter and continue at 70⁰ for a further minute or until melted
  • Add sugar and mix for 3 seconds on speed 3
  • Let the mix cool a little while you grease and line a 23cm springform pan
  • When chocolate mix has cooled to 37⁰ scrape down the sides to incorporate any chocolate stuck to the sides.   Add eggs, bourbon and vanilla and mix for 20 seconds on speed 4 or until mixture is smooth and almost mousse like
  • Pour into prepared pan (enjoy licking the spoon) and bake for around 30 minutes or until a skewer comes out with a few crumbs and is still a little moist
  • Once cooled serve with cream and fresh berries.  You only need small pieces and the fresh berries complement the richness beautifully!


ps.  The outcome of the cake was everyone loved it!  But my brother couldn’t believe I baked something that didn’t have hidden veggies!

Tuesday, 31 December 2013

Roasted Rhubarb and Ginger Cheesecake


Well it’s time to celebrate!!!  Merry Christmas and Happy New Year for a Happy and Healthy 2014!
And apologies for the lack of recent recipes, I’ve been a little bit unwell for a few months, but in a good way.  Because we’re having another baby!

Roasted Rhubarb and Ginger Cheesecake - a mini version for us to taste test!

 
It all began a few months ago now when I started to sell off my baby gear.  It brought me to tears!  We had always tentatively said two children was enough, the pigeon pair, a boy and a girl.  But when we had a serious discussion it just felt right to have another.  And we’re not getting any younger so it was now or never.
So now here I am, on the brighter side of severe morning / evening sickness and a few daunting tests.  The sun is starting to shine and food is becoming my friend again!
While I still prefer savoury to sweet a special occasion calls for a treat.  We celebrated my parents house warming and my mum’s birthday a few weeks ago and I knew this Rhubarb and Ginger Cheesecake would be just right (inspired by a similar cake I saw on The Great British Bake Off – I’ve never watched so much television as I did in the last few months!)  This cheesecake is not too sweet and best made the day ahead.


Roasting the rhubarb and ginger...


biscuit base pressed in the tin...

swirl the rhubarb through the mix...

bake and voila!
 

Roasted Rhubarb and Ginger Cheesecake

1 bunch or around 5 large stems of rhubarb cut into 1-2 cm pieces

1cm piece of ginger

½ cup orange juice

¼ cup rapadura sugar

200g gingernut biscuits

75g butter

120g raw sugar

500g fresh ricotta

250g cream cheese

250g greek yoghurt

1 tbls cornflour

1 tsp vanilla extract

4 eggs

 
Roasted Rhubarb Puree

·         Place rhubarb, ginger, ¼ cup sugar and orange juice into a baking dish and bake for 20 -30 minutes at 180° or until cooked through and slightly browned

·         Cool slightly then puree in Thermomix bowl for 10 seconds on speed 6 then set aside and wash bowl (note: this puree can be made the day before and is delicious on top of muesli and yoghurt)

Biscuit base

·         Line 24cm springform tin with baking paper or lightly grease

·         Place biscuits in TM bowl and crush for 6 seconds on speed 8 then set aside with no need to clean the bowl

·         Add butter to TM bowl and melt for 3 minutes at 50° on speed 2

·         Return biscuits and mix for 10 seconds on speed 6

·         Place biscuit mix into prepared tin and press down firmly with the assistance of a mug or spatula then place in the fridge while preparing the filling

Cheesecake filling

·         Clean and dry TM bowl thoroughly and preheat oven to 160°

·         Add 120g sugar and mill for 10 seconds on speed 9

·         Insert butterfly and add ricotta, cream cheese, yoghurt, vanilla, eggs and cornflour then mix well for 30 seconds on speed 4 or until mixture is smooth and creamy

·         Pour mixture into base then place spoonfuls of rhubarb puree on top and gently swirl around with the end of a teaspoon

·         Bake for 50 – 60 minutes (apparently a dish of water in oven helps prevent cracking at this stage)

·         Then turn oven off and leave cheesecake to cool slowly for about another hour

·         Once completely cooled (perhaps overnight) remove from tin, serve and enjoy every mouthful!

Saturday, 13 July 2013

Lemonies (Lemon Brownies!)

It’s the end of an era ...  and the end of my bountiful supply of lemons!

The last of the lemons...

My parents have left their family home.  After over 35 years as a home to three children, countless friends and welcome visitors, a backyard wedding and now three grandchildren, it’s been a home well loved.  While this has been a family home for so long and there was an incredible amount to move, my parents have been by far the most organised movers I’ve ever known (and the Salvos have been well donated to!)

 
Bit sized, tart, lemon brownies or lemonies!

Yesterday I took my kids for one last goodbye to the empty home and if walls could speak there’d be thousands of stories told by these walls.  Ahh the memories...
 
Our other goodbye was to the lemon tree.  The most bountiful lemon tree I have ever known.  It produces large, juicy fruit almost all year round and in fact, I think I’ve bought a lemon just once in my life and I use a lot of lemons!  So for the Willow Tree farewell party my parents recently had, desert was all about lemons.  Mum made a classic no bake lemon slice, my sister made gorgeous miniature lemon meringue pies and I made my new discovery ... lemon brownies, or lemonies as we’ve started to call them.  And you know what?  I think I like them more than chocolate brownies, and that’s saying something!

So if you know someone with a lemon tree, grab a few and give it try.

Lemonies
Rind of 2 lemons
250g raw sugar
250g butter, cubed
4 eggs
230g plain flour
90g coconut, desiccated
60g of lemon juice (around 1 large lemon)
 
Icing:
½ cup icing sugar
1 tbls lemon juice
1 tsp lemon zest

  • Line a 20x30cm slice tray with baking paper and preheat the oven to 180°
  • Place the lemon rind in the TM bowl and mill for 10 seconds on speed 9.  Remove 1 tsp of zest for icing later
  • Add the sugar to TM bowl with zest and further mill for 4 seconds on speed 9
  • Add the butter and heat for 3 minutes on 60 degrees on speed 2 to melt
  • Add the eggs and mix together on speed 3 for about 20 seconds
  • Add the flour, coconut and lemon juice and mix together for 8 seconds on speed 6
  • Spread the mixture evenly into the tray and bake for 25-30 minutes or until the top is just set to keep the lemonies a bit fudgey
  • Place onto a cooling rack to cool while making icing
  • Icing: mix ½ cup icing sugar, 1 tbls lemon juice and 1 tsp lemon zest  until smooth then poor over cooled lemonies
  • Serve in small pieces


Monday, 27 May 2013

Spiced Pumpkin and Honey Cake


Spiced Pumpkin and Honey Cake


It’s been a busy few months – hence the short supply of recipes and stories of late.  I’ve been working 4 different part time jobs (all physiotherapy related) plus the usual 2 kids and house to run.  I really thought I was in total control and rather enjoying the pace of being constantly on the go – mind and body.  However, I think anxiety has reared it’s ugly head back into my life and crept up to me to say “hey, slow down please”.  Fortunately I’m at a point in my life where I could recognise the symptoms and I’m back on track.  So while time has been a squeeze, and my writing has been squeezed out for awhile, rest assured there’s plenty of recipes and stories to come...

And luckily I have 2 awesome kids who make me laugh.  Especially little Finn who adores his big sister so much he insists on wearing her pyjamas and having his hair in pigtails. This is him saying “cheese” for  the camera...


And when time is limited what better way to get some nutrients and fibre in to the kids than with a veggie cake.  I had some roasted home grown pumpkin so came up with this Spiced Pumpkin and Honey Cake and it’s really hit the spot.  PS, for some kids, don’t tell them it has veggies and they’ll never know!


Spiced Pumpkin and Honey Cake
60g walnuts
250g cooked and cooked pumpkin (or combined with grated carrots and zucchini is nice too!)
¼ cup (85g) honey
¼ cup (60g) coconut oil (or other light oil)
2 eggs
60g milk
1 tsp vanilla
20g rapadura sugar
½ tsp each nutmeg, cloves, ginger and cinnamon
1 cup wholemeal flour
1 cup SR flour
½ cup sultanas
  • Preheat oven to 175° and line a loaf tin
  • Add walnuts to Thermomix bowl and chop for 3 seconds on speed 6
  • Add pumpkin, eggs, milk, honey, oil , vanilla and sugar and mix for 30 seconds on speed 5
  • Add spices, flours and sultanas and blend in Reverse on speed 4 for 10 seconds or until combined
  • Spoon into prepared loaf tin and top with shredded coconut and pepitas if desired
  • Bake for approx  1 hr or until cake springs bake when touched
  • Allow to cool for around 30 minutes before slicing
Enjoy warm with your favourite tea or Crio Bru!

Friday, 17 May 2013

Rhubarb Yoghurt Cake


What mother (and daughter) doesn’t like rhubarb (and the colour pink)? So what perfect Mothers Day cake than a Rhubarb Yoghurt Cake.  Not too sweet, a little tart. Delicious served warm or enjoyed for several days later if there’s any left.

 
We had a lovely mother’s day.  I ventured on an early walk with  little Finn the early riser where he insisted on riding his little bike.  What would normally take about leisurely 40 minutes to the beach and back took 2 hrs with a stubborn little boy who rode at least 4 km!  Once home we were treated to blueberry ricotta pancakes and some great coffee.  We then ventured off to Grandmas...

 
After 35 years in their current house Grandma and Grandpa are finally moving to a new home down the coast.  Call it retirement, call it a seachange, either way I think it’s a great lifestyle move for them and we’re excited as they’ll be a little closer (so look out for more visits!).   We had a very relaxed afternoon which as usual revolved around food.   A scrumptious lunch of vegetarian lasagne, quinoa salad, scalloped potatoes, and some fresh ciabatta bread with pistachio dukkah.  All finished with grandma’s trifle and my Rhubarb Yoghurt Cake.  Yum!

But this cake can doesn’t need a special occasion, just some fresh rhubarb from the garden and it’s a regular treat.

Rhubarb Yoghurt Cake
60g butter
250g raw or rapadura sugar
1 tsp vanilla
2 free range eggs
250g plain or Greek yoghurt
Pinch salt
1 tsp bicarb soda
1 tsp cinnamon
150g wholemeal plain flour
150g self raising flour
350g rhubarb diced


·   Grease and line a 20cm springform tin and preheat oven to 160°
·    Place sugar and butter in Thermomix bowl and cream for 20 seconds on speed 6
·    Add vanilla and eggs and mix for 10 seconds on speed 4
·   Add yoghurt and mix for 5 seconds on speed 4
·   Add remaining ingredients apart from rhubarb and mix until combined, about 10 seconds on speed 4
·   Add rhubarb and mix for 5 seconds on speed 4 in Reverse
·   Spoon mixture into tin and bake for about 1 hr 15mins at 160°
Serve with fresh berries and cream or pomegranate seeds and Greek Yoghurt for extra tartness
Enjoy!

Monday, 28 January 2013

Chocolate and Zucchini Cake


A close cousin of mine has changed her cooking completely since her Thermomix purchase all in aid of better nutrition of her 3 gorgeous children.  We visited them today (much to my kids delight) and  when I saw her children who are often a little veggie phobic asking for more Chocolate and Zucchini Cake I giggled inside with glee!
Chocolate Zucchini Cake

This cake is based on the Zucchini Loaf in “A Taste of Vegetarian” Thermomix book and makes 2 loaves which are quiet moist, keep well and can even be frozen.  They are handy when you have a busy social calendar (like us this weekend!) as they’re quick, easy and somewhat healthy for the kids.  The first time we made half as per the book then added good quality cocoa to the other half.  A winner by far as everyone thinks they’re eating a delicious, moist chocolate cake with little idea of the green goodness that’s packed inside them.
The original Zucchini Cake and the Chocolate version

While the original recipe used 350g of raw sugar I find that 200g and a little honey is plenty for the 2 loaves.  You could leave the walnuts a little coarser but I find when you’re trying to disguise the goodies a little finer helps.  Anyway, just grab some in season zucchini, from the garden if you can and bake it!

Chocolate and Zucchini Cake
100g walnuts
300g zucchini cut into 3cm chuncks
3 free range eggs
200g raw sugar
20g honey
250g grapeseed oil
2 tsp vanilla
370g plain flour
1 tsp bicarbonate of soda
2 tsp baking powder
2 tsp cinnamon
Pinch sea salt
3 tbls good quality cocoa powder

  • Preheat oven to 180° and grease and line 2 loaf pans with baking paper
  • Place walnuts into Thermomix bowl and set dial to closed lid position and pulse by pressing Turbo button 3 times for 1 second each then set aside
  • Place zucchini in bowl and chop for 4 seconds on speed 4 and set aside
  • Place eggs, sugar, oil and vanilla into bowl and blend for 20 seconds on speed 4
  • Add all remaining ingredients including zucchini and walnuts and mix for 10 seconds on speed 3 in Reverse
  • Pour into loaf tins and bake for 50 minutes or until a skewer comes out clean

Enjoy!

Wednesday, 5 December 2012

Rhubarb and Apple Muesli Crumble Cake

What’s there not to love about rhubarb!
Rhubarb and Apple Muesli Crumble Cake
It’s easy to grow year after year from the same crown, it’s looks gorgeous, tastes divine and is very easy to cook.  The rhubarb in my garden has had a growth spurt after some warm weather followed by plenty of rain so I have a few rhubarb recipes on the go today.
An abundance of perfect rhubarb in the vegie patch just screaming out to be eaten!
One is a Roasted Rhubarb and Strawberry  Icecream that I’m planning for the weekend with a heat wave on the way but for desert tonight I thought I’d treat the family to a Rhubarb and Apple Muesli  Crumble Cake.  Couldn’t decide between Rhubarb Crumble and cake so I simply merged the 2 and aren’t we a happy family!
 
It was also one of those Thermomix days where it’s just too tempting to “whip” up something in your magic machine when the kids are behaving themselves.  And the kids pretty much have fruit and yoghurt for dessert most nights so I thought a treat would be like the saying “a change is as good as a holiday”.
 
Rhubarb and Apple Muesli Crumble Cake
50g butter cubed
2 tbls rapadura or raw sugar
1 cup of muesli
1 stalk of rhubard extra cut into 1cm pieces
120g butter cubed
140g raw sugar
180g yoghurt
1 tsp vanilla
2 eggs
220g SR flour
1 tsp cinnamon
½ tsp ground ginger
 
  • Preheat oven to 180°
  • Grease and line a 22cm springform tin
  • Place 50g butter, 2 tbls sugar and muesli in Thermomix bowl and mix at 90° on speed 2  for 2 minutes or until butter has melted.  Set aside
  • Place remaining butter and sugar in bowl and mix for 20 seconds on speed 6 then scrape down
  • Add eggs,  and vanilla and mix for a further 20 seconds on speed 6
  • Add dry ingredients and combine for 5 seconds on speed 4
  • Pour into cake tin, spread with apple and rhubarb and gently stir through batter
  • Sprinkle with raw rhubarb pieces followed by muesli crumble mix
  • Bake at 180° for 55 minutes or until skewer comes out clean
  • Best enjoyed warm with a dollop of thick yoghurt or cream!
  •  

Friday, 23 November 2012

Carrot Cake with Cream Cheese Frosting


Any excuse for a cake or two! 
Carrot Cake with Cream Cheese Frosting
It’s Grandma’s birthday tomorrow and she’ll be spending her fun filled day with the kids while I head off to work.  Of course we need a cake to sing happy birthday as soon as she walks in the door, probably multiple times throughout the day, then again for a family dinner. 
The kids at the park with Grandma
 Another reason to celebrate is about half of the people at work completed the Run Geelong like I did on the weekend.  Run Geelong was a huge success with 11,792 Participants and over $500, 000 raised for the children’s ward at the Geelong Hospital. 

The quickly devoured cake at work - most of it gone by 11am!
 So I think everyone deserves cake!
Happy Birthday Grandma!
 I decided on carrot cake as Grandma is not really a sweet tooth and this is the type of cake I don’t mind the kids sharing.  In fact for the 2 cakes I had Summer count out 10 carrots which adds plenty of fibre and vitamins not to mention moisture and taste.  I put all those carrots straight into the Thermomix and in just a few seconds I had a bowl full of bright orange goodness. I chopped the pecans and mixed the icing for both cakes at once also and just made the rest of the cakes separately (only because the mix is quiet large).

This cake is actually a Donna Hay recipe with my predictable variations of much less sugar, a little honey and some nutmeg.  Very easy but a real crowd pleaser!

 Carrot Cake with Cream Cheese Frosting
60g pecans
5 carrots (preferably organic)
110g rapadura (or raw) sugar
60g local honey
180g grapesed or other neutral flavoured oil
3 eggs
100g wholemeal flour
125g plain flour
1½ tsp baking powder
1 tsp bicarb soda
1 tsp cinnamon
½ tsp ginger
½ tsp nutmeg
80g sultanas

250g cream cheese
100g icing sugar (I milled raw sugar)
1 tbls lemon juice

  • Preheat oven to 180°C and grease or line a 20cm baking tin (square or round) with baking paper
  • Place pecans in Thermomix bowl and chop for 3 seconds on speed 6 then set aside
  • Place carrots in bowl and chop for 5 seconds on speed 6 then set aside
  • Place sugar, honey and oil in bowl and mix for 1 minute on speed 6 (no need to clean bowl between)
  • Add eggs and mix for another 20 seconds on speed 6
  • Add flours and spices and mix for 5 seconds on speed 5
  • Add carrots, pecans and sultanas and mix for 10 seconds, speed 2 on Reverse
  • Pour into baking tin and bake for 55 – 60 minutes or until inserted skewer comes out clean
  • Allow to cool before removing
  • For the icing, in a clean Thermomix bowl mill raw sugar to icing sugar (30 seconds speed 9)
  • Add cream cheese and icing sugar and mix about 30 seconds speed 6
  • Refrigerate a little while cake is cooling then simply pour over.

This cake is best stored in the refrigerator due to the cream cheese frosting  

Enjoy!

Tuesday, 25 September 2012

Persian Love Cake


Don’t you just love it when you have a special occasion to bake for and you know exactly what you’re going to make?  I’ve had several events recently where I knew straight away that the almost infamous Persian Love Cake was the way to go.  Special events for special people like my sister’s birthday, a fundraiser for Heart Kids, and when a well liked work colleague was moving on. 

Persian Love Cake
 
For those who have already had the pleasure of trying a piece of Persian Love Cake you’ll already know that’s it quite different to any other cake.  In fact it’s not really a cake but perhaps more a like a cheesecake, a custard tart or a pumpkin pie as fellow consumers have described.  And it plays a little on the sense.  First of all the name is intriguing if not alluring.  Secondly, it looks inviting with its dark caramelisation against the pretty pistachios.  The smell is warm and cosy and certainly if you grind your own nutmeg the entire house smells warm and cosy.  Then there’s the uniqueness of the texture.  The almond meal and sugar in the base is also used in the filling with the addition freshly ground nutmeg, eggs and yoghurt so both the flavour and texture carries through. 

Pressing down half the mixture for the base...

And finally the taste, a taste that hits you immediately then continues to linger as you consume and even for some time afterwards.  A taste that sends you somewhere exotic even if you’ve never been there before.  And because of the intensity and fragrance of the taste a little bit goes a long way.  Which either means plenty of decadence for sharing, or plenty for you to enjoy for up to a week which is apparently how long it will keep, however I’ve never had one last for more than 2 days.

Out of the Thermomix bowl and ready to be baked...
 
Did I mention is really quick and easy?  Here’s the link to the original recipe in Gourmet Traveller from Qom restaurant.  My version however has half the amount of sugar and still is very sweet and a slight increase in almonds which I grind for longer to reduce the grittiness I found in my first attempt.  I grind my own almonds which I store in the freezer to maintain freshness. This time I decided to dry roast the almonds for a few minutes in the oven as it warmed up which I feel maintained more lightness in the cake. 

So what are you waiting for?  Invite yourself to something special and get baking. 


Persian Love Cake

40g pistachios
1 clove of nutmeg
400g almonds
110g brown sugar
110g raw sugar
1 tsp salt
120g butter cubed
2 free range eggs
250g Greek style yoghurt


Preheat oven to 175° and line a 23cm springform tin with baking paper
Roughly chop pistachios then set aside.  (This can be done in the Thermomix by using the Turbo button 3 times but I prefer the more structured look of hand cutting)
Place nutmeg in Thermomix bowl and grind for 15 seconds on speed 9.  Set aside
Place almond in Thermomix bowl and mill for 20 seconds on speed 9
Add the sugar and mix for 10 seconds on speed 6
Add the butter and sugar and mix for 15 seconds on speed 5
Pour half mixture into lined springform pan and press (I know half sounds a bit ambiguous but mine measured 12mm – next time I will weight it)
Add eggs and nutmeg to the remaining mix and mix 10 seconds on speed 4 then scrape down
Add yoghurt and mix for a further 10 seconds on speed 4
Pour into tin and scatter pistachios around edge
Bake for 40-45 minutes until golden
 
Serve with your favourite Greek yoghurt

Enjoy!

Saturday, 8 September 2012

Carrot, Date and Pecan Cake

Purple Carrots
Last weekend we had the pleasure of venturing to the nearby Moriac Makersand Growers market.  There’s something about this market that makes it just that little bit different.  It’s only held every three months and there’s a cute yet quirky feel to it.  There’s local produce including cheeses, olives, bread, and Summer’s favourite icecream.  Then there’s lovely handmade bits and pieces including gorgeous handmade hair clips and earrings which Summer, our friend Lauren and I treated ourselves to.
Purple Carrot, Date and Pecan Cake
Although it was a lovely sunny day it was a bit of a mud pit but none the less we enjoyed a shared lunch with live music and the kids had fun on the playground nearby.  My most exciting purchase was a bag full of fresh, local, organic vegies.  I could have easily bought 2 bags full but I tried to resist.  Lauren even found kohl rabi which she bought one for her dad for father’s day.  How gorgeous is that!


One of our favourites was a bunch of multi coloured carrots which we’ve really enjoyed all week.  The last to be consumed was some purple carrots, so today came the idea of making a carrot cake – with purple carrots!  The recipe is actually based around the Zucchini cake in the “A Taste of Vegetarian” Thermomix cookbook but using carrots, much less sugar, pecans instead of walnuts, and a little honey. Yum!


Chopped Pecans, Dates and Purple Carrots

Carrot, Date and Pecan Cake
70g pecans
100g dates
250g carrots (any colour roughly chopped)
100g sultanas
2 free range eggs
90g grapeseed oil
60g raw or rapadura sugar
80g honey
1 tsp cinnamon
½ tsp salt
210g self raising flour
  • Pre heat oven to 180° and lightly grease a round cake tin (or loaf pan)
  • Place pecans in Thermomix bowl and chop for 10 seconds speed 7 then set aside
  • Place dates in Thermomix bowl and chop for 12 seconds speed 6 and add to pecans
  • Place roughly chopped carrots in Thermomix bowl and chop for 5 seconds speed 5 and add to pecans and dates
  • Place eggs, oil, sugar, honey, cinnamon, salt and sultanas in Thermomix bowl and mix for 10 seconds speed 4
  • Add flour and bowl of pecans, dates and carrots and mix for 25 seconds speed 4
  • Pour into cake pan and bake for 45 minutes or until inserted skewer comes out clean 
Lovely served with a dollop of Greek yoghurt

Enjoy!