Sunday 30 September 2012

Spinach, Pesto and Feta Scrolls


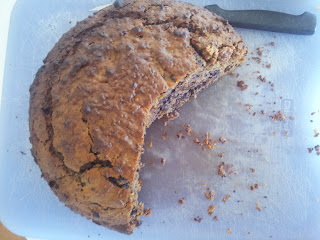
We love visiting family and friends on the weekends and I can’t help myself but to always take a yummy treat to share.  Today we were visiting close friends in their new home.  They wanted to see my Thermomix in action and had a beautiful home grown pumpkin to use so we planned to make my Morrocan Pumpkin and Red Lentil Soup followed by a Torta Caprese from the Thermomix EDC.  Too easy and a great way to inspire. 

Spinach, Pesto and Feta Scrolls

I decided to whip up my very popular Spinach, Pesto and Feta Scrolls to go with the soup and they were the best yet!  It’s basically a simple bread recipe shaped into a rectangle after the first rise, spread with a pesto of your choice, sprinkled with plenty of feta, and followed by a some fresh baby spinach leaves.  This is then rolled, sliced and baked and most importantly enjoyed fresh straight out of the oven.  While I usually cook these at home before venturing out to visit, today I left them to have a second rise during the car ride so they were super light and fluffy. 

The scrolls didn’t quite make it as a side for the soup.  More of a delicious entree and could easily be a lunch on their own.  I’ve also made these successfully with a tomato based pesto.  Yum!


100g wholemeal bread flour or other milled grain
400g unbleached white bread flour
300g lukewarm water
7g dry yeast
20g olive oil
½ - 1 tsp salt
¼ cup home made or store bought basil pesto
100g feta
Handful baby spinach leaves

  • Add wholemeal flour to Thermomix bowl and further mill 5 seconds speed 6
  • Add yeast and water and mix for 1 minute speed 2 to activate yeast
  • Add remaining flour, oil and salt and knead for 2 min 30 sec on Interval Setting
  • Wrap in Thermomat or other silicone mat and allow to rise in a warm place for an hour or until doubled in size (remember the longer the rise the better the final product)
  • Gently stretch and shape to a long rectangle about 1.5cm thick on mat or floured surface
  • Spread with pesto, sprinkle with crumbled pesto and spinach
  • Carefully roll from long edge to form a long roll then using back of spatula cut into approximately 7 pieces
  • Arrange in a springform tin lined with baking paper and allow to rise for a final 30  minutes
  • Bake at 220° for 25-30 minutes until golden and hollow sounding when knocked


Best eaten straight from the oven

Enjoy!

Friday 28 September 2012

Immune Boosting Green Soup

It’s that time of year when everyone in the house has a bit of a running nose and is feeling a bit run down.  Time for some immune boosting and what better way to do that than with a yummy soup, filled with nutrients and goodness.  And even better it’s easy to make and easy to eat.  It’s one of those things that the Thermomix does best.

Immune Boosting Green Soup with homemade Tortillas
 
Any of your favourite bread such a some ciabatta would be delicious but today I served this soup with some cheesy toasted homemade tortilla – my latest bread discovery!

Lemon and Silverbeet

 There are heaps of ways to boost your immune system and this soup contains just a few:

  • Garlic is a powerful immune booster that stimulates infection fighting white cells, boosts natural killer cell activity, and increases the efficiency of antibody production.
  • Vitamin C increases production of infection fighting white blood cells and antibodies especially interferon, the antibody that coats cell surfaces and prevents the entry of viruses.
  • Vitamin E is found in sources such as sunflower seeds and has anti-inflammatory and antioxidant benefits.
  • Zinc plays an important role in the immune defence system and can be found in legumes and seeds. Soaking them increases their bioavailability which is important for vegetarians.  Dulse and other sea vegetables also contain Zinc and Vitamin E.
  • Omega-3 fatty acids such as those found in flax seed oil act as immune booster by increasing the activity of phagocytes, the white blood cells that eat up bacteria.
Fresh Broccoli and Silverbeet

So make you and your family a big pot of this immune booster to keep the chills away or at least reduce their stay.

 
Immune Boosting Green Soup
250g green lentils
800g water
1 onion
1 clove garlic
1 tbls olive oil
1 large or 2 small potatos cubed
1 stick celery roughly chopped
1 small or ½ a large broccoli roughly chopeed
1 bunch of silverbeet with stalks removed and well rinsed to get rid of any grit and any crawling friends
1 tsp vege concentrate
1 tbls fresh thyme
Juice of half a lemon
Pinch of nutmeg
2 tbls flaxseed oil

  • Soak lentils in  water for 4-6 hours
  • Place basket in Thermomix bowl and pour in soaked lentils and enough water to cover and cook for 20 minutes on speed 1 at 100°
  • Remove basket of lentils and set aside stock water for later
  • Place onion and garlic in Thermomix bowl and chop for 5 seconds on speed 6
  • Add oil and sauté for 3 mintues at 100° on speed 2
  • Add potato and sauté for an additional 5 minutes at 100° on speed 2
  • Add celery, broccoli, lentils, thyme, vege stock and water and cook for 10 minutes at 100° on speed 2
  • Add silverbeet and lemon juice and cook for a final 5 minutes 100° on speed 2
  • Add flaxseed oil and blend for 10 seconds on speed 4
Serve with a dollop of yoghurt and a sprinkle of sunflower seeds


Immune Boosting Green Soup
Enjoy!


Tuesday 25 September 2012

Persian Love Cake


Don’t you just love it when you have a special occasion to bake for and you know exactly what you’re going to make?  I’ve had several events recently where I knew straight away that the almost infamous Persian Love Cake was the way to go.  Special events for special people like my sister’s birthday, a fundraiser for Heart Kids, and when a well liked work colleague was moving on. 

Persian Love Cake
 
For those who have already had the pleasure of trying a piece of Persian Love Cake you’ll already know that’s it quite different to any other cake.  In fact it’s not really a cake but perhaps more a like a cheesecake, a custard tart or a pumpkin pie as fellow consumers have described.  And it plays a little on the sense.  First of all the name is intriguing if not alluring.  Secondly, it looks inviting with its dark caramelisation against the pretty pistachios.  The smell is warm and cosy and certainly if you grind your own nutmeg the entire house smells warm and cosy.  Then there’s the uniqueness of the texture.  The almond meal and sugar in the base is also used in the filling with the addition freshly ground nutmeg, eggs and yoghurt so both the flavour and texture carries through. 

Pressing down half the mixture for the base...

And finally the taste, a taste that hits you immediately then continues to linger as you consume and even for some time afterwards.  A taste that sends you somewhere exotic even if you’ve never been there before.  And because of the intensity and fragrance of the taste a little bit goes a long way.  Which either means plenty of decadence for sharing, or plenty for you to enjoy for up to a week which is apparently how long it will keep, however I’ve never had one last for more than 2 days.

Out of the Thermomix bowl and ready to be baked...
 
Did I mention is really quick and easy?  Here’s the link to the original recipe in Gourmet Traveller from Qom restaurant.  My version however has half the amount of sugar and still is very sweet and a slight increase in almonds which I grind for longer to reduce the grittiness I found in my first attempt.  I grind my own almonds which I store in the freezer to maintain freshness. This time I decided to dry roast the almonds for a few minutes in the oven as it warmed up which I feel maintained more lightness in the cake. 

So what are you waiting for?  Invite yourself to something special and get baking. 


Persian Love Cake

40g pistachios
1 clove of nutmeg
400g almonds
110g brown sugar
110g raw sugar
1 tsp salt
120g butter cubed
2 free range eggs
250g Greek style yoghurt


Preheat oven to 175° and line a 23cm springform tin with baking paper
Roughly chop pistachios then set aside.  (This can be done in the Thermomix by using the Turbo button 3 times but I prefer the more structured look of hand cutting)
Place nutmeg in Thermomix bowl and grind for 15 seconds on speed 9.  Set aside
Place almond in Thermomix bowl and mill for 20 seconds on speed 9
Add the sugar and mix for 10 seconds on speed 6
Add the butter and sugar and mix for 15 seconds on speed 5
Pour half mixture into lined springform pan and press (I know half sounds a bit ambiguous but mine measured 12mm – next time I will weight it)
Add eggs and nutmeg to the remaining mix and mix 10 seconds on speed 4 then scrape down
Add yoghurt and mix for a further 10 seconds on speed 4
Pour into tin and scatter pistachios around edge
Bake for 40-45 minutes until golden
 
Serve with your favourite Greek yoghurt

Enjoy!

Saturday 22 September 2012

Olive, Cheese and Rosemary Bread


Now that I’ve been baking my own bread for some time now I’m really looking for different and tasty variations.  Today’s delight started as a Rosemary and Cheese loaf but my gorgeous daughter Summer insisted on her favourite which is Olive Bread. The result was all of the above and it turned out just great.  It even looked quite pretty as the olives I used gave the bread a rather purple tint – perhaps that’s why Summer loved it so much!

Fresh from the oven...
Some rosemary out of the garden, home cured olives and a combination of grana pandano and tasty cheese in a wholemeal and white bread kept the whole family coming back for more.  Of course we all started with a piece fresh out of the oven with home made butter then I had to send them all outside to enjoy the spring sunshine so I could compile some lentil burger and salad sandwiches for the crew. 

A delicious lentil burger and salad sandwich
And of course being outside included playing in the sandpit so when lunch arrived the joke of the day was... “what do witches eat at the beach?”......... “ sandwitches!”

A great accompaniment to home made baked beans
We enjoyed this bread straight from the oven, for a sandwich and lightly toasted to accompany our delicious home made baked beans. Yum!  This recipe could also make fantastic rolls.  Notice there's no added salt as there's plenty of flavour from the olives, cheeses and rosemary. A delicious change from everyday bread.


can you smell the fresh rosemary?

Olive, Cheese and Rosemary Bread
2 tsp fresh rosemary
40g Grana Pandana (or parmesan) cheese
50g tasty cheese
50g pitted olives
300g lukewarm water
8g dry yeast
100g wholemeal flour or milled grains of choice
400g white bakers flour
20g olive oil

  • Add rosemary to Thermomix bowl and mill for 20 seconds speed 8
  • Add cheeses and mill for a further 10 seconds speed 6 then set aside
  • Add water and yeast to thermomix bowl (no need to clean between) and  mix for 1 minute speed 2
  • Add flours and oil and knead 2 minutes on Interval setting
  • Add rosemary, cheese and olives and knead for an extra 1 minute on Interval setting
  • Wrap in Thermomat or lightly oiled bowl and place in a warm spot to double in size
  • Shape into desired loaf shape and place on a tray or tin lined with baking paper (I tried a lined springform tin today and this worked just great) and allow a 2nd rise of about 30 minutes
  • Meanwhile preheat oven to 220°
  • Spray loaf lightly with water and bake for 30 minutes or until sounds hollow when knocked

Enjoy!

Dough waiting to rise...

Sunday 16 September 2012

Banana, Raspberry and Coconut Loaf

Grandma's beautiful orchids
Isn’t it amazing how much kids love their Grandparents.  My daughter Summer was so excited this morning because Grandma and Grandpa were coming to visit. She even sat at the front window gazing out waiting for them saying repeatedly “I just want Grandma and Grandpa to be here...”  When I asked her what sort of cake I should make for them she suggested a raspberry cake.  I was thinking a banana loaf so guess what we came up with?

Banana, raspberry and coconut loaf with Grandma's orchids

A delicious and delicate tasting wholesome treat.  Bananas keep the loaf moist and healthy, the raspberries add a wonderful burst of flavour (and Summer’s favourite colour), and the coconut adds natural sweetness and even more taste.  Using part wholemeal flour adds extra fibre and nutrition without affecting the texture.  The addition of walnuts adds Omega 3 essential fatty acids which are great for healthy brains (which they even look like!).   And while raw sugar can be used, rapadura sugar is unrefined and retains many vitamins and minerals because the molasses is not separated from the sugar cane juice it is extracted from.  Check out this great document I came across about rapadura on the Quirky Cooking website.

Banana, Raspberry and Coconut Loaf

60g walnuts
2 ripe bananas (mine were approx 180g)
1 tsp vanilla
2 eggs
80g grapeseed oil
130g milk
80g rapadura sugar
100g SR flour
100g wholemeal SR flour
30g coconut
½ tsp cinnamon
1 cup raspberries (I used frozen but fresh is great if in season)
  • Place walnuts in Thermomix bowl and grind for 5 seconds speed 7
  • Add bananas, vanilla, eggs, milk, and oil and mix for 10 seconds speed 6
  • Add flours, sugar, coconut and cinnamon and mix for 10 seconds speed 4
  • Add most of the raspberries and mix on Reverse for 5 seconds speed 1
  • Pour into lined loaf pan and sprinkle with remaining raspberries
  • Bake at 180° for 45-50 minutes or until inserted skewer comes out clean
Enjoy!

Wednesday 12 September 2012

Super Soft Buttermilk Rolls


I’m so excited to share that I today I have made the softest, fluffiest bread rolls that not only have I ever made but ever had the pleasure of eating!  And a special thanks to Tenina who provided this recipe on her website which I only changed a little.  And the result was light, melt in your mouth bread rolls that disappeared very quickly.


Like many others I had made a fresh batch of butter this morning and while I usually make the Buttermilk bread in the Thermomix EDC I ventured for something a little different and am certainly glad I did. Tenina provides a link which discusses the science of buttermilk and the effect it has on the bread.  The recipe is also a little different in that it starts with a roux.  My variations included reducing the sugar and I used half buttermilk / half water for the dough just because that's how much buttermilk I had from my butter.  And as there was a little butter left in the bowl to start with, I reduced it for the dough to balance out.

It is truely devine!


Super Soft Buttermilk Rolls

Roux:
30g flour
10g sugar
120g buttermilk

Dough:
350g bakers flour
Pinch salt
25g butter
110g buttermilk
100g water
1 sachet dried yeast (2tsp)

  • Place Roux ingredients into Thermomix bowl and cook for 3 minutes at 80°C on speed 3. Cool slightly. Leave in Thermomix bowl.
  • Add all dough ingredients except yeast to cooked Roux in Thermomix bowl and mix for 10 seconds on speed 6
  • Add yeast and with dial set to closed lid position, knead for 4 minutes at Interval speed
  • Leave in bowl with lid on in a warm place to  prove until doubled
  • Shape into rolls with wet hands. (This makes the stickiness easier to cope with.) Place onto lined baking sheet or Thermomat and dust with flour
  • Cover and rise again
  • Place into cold oven and bake for 15-20 minutes at 200°C

Enjoy! (especially with fresh butter straight from the oven!)

Tuesday 11 September 2012

Stewed Apple and Rhubarb


Catching up with special friends makes you feel all warm and cosy, just like eating this yummy Stewed Apple and Rhubarb.  In this case it was a very dear cousin of mine, a newbie to the Thermomix world, who I visited today.  She treated me to a delicious piece of lemon cake from the Thermomix EDC book and I can honestly say it was perfect.....She’s an amazing mum to her adorable kids, not to mention a business owner and house renovator.  But most of all she’s a great friend who always puts a smile on my face.


The last of the rhubarb...


Today she was steaming some pears for her baby girl in the Varoma of her newly purchased Thermomix which prompted me to share my way of cooking fruit.  This is so quick and easy I either whip this up for the kids for breakfast to top their cereal or for a healthy desert with yoghurt, or sometimes topped with a little custard.


While apples are still in full season my rhubarb in the vege patch is just finishing off and it’s time to trim it back and divide a few crowns.  I’d love to add another veggie plot soon and perhaps move the rhubarb there so watch this space.  For now it’s time to pick these last few stems and enjoy.


Stewed Apple and Rhubarb

Approx 300g peeled and cubed granny smith or other tart apples (3-4 apples depending on size
100g rhubarb stems cut into 2 cm pieces
50g water
A few squeezes of lemon juice
¼ tsp cinnamon

  • Place apples in Thermomix bowl with water, lemon juice and cinnamon
  • Cook for 6 minutes on Reverse speed 1
  • Add rhubarb and cook an extra 2 minutes on Reverse speed 1

Note: Cooking time will vary on the type of apples and how firm or soft you like the end result.  I simply cook for an extra minute at a time if needed.

Saturday 8 September 2012

Carrot, Date and Pecan Cake

Purple Carrots
Last weekend we had the pleasure of venturing to the nearby Moriac Makersand Growers market.  There’s something about this market that makes it just that little bit different.  It’s only held every three months and there’s a cute yet quirky feel to it.  There’s local produce including cheeses, olives, bread, and Summer’s favourite icecream.  Then there’s lovely handmade bits and pieces including gorgeous handmade hair clips and earrings which Summer, our friend Lauren and I treated ourselves to.
Purple Carrot, Date and Pecan Cake
Although it was a lovely sunny day it was a bit of a mud pit but none the less we enjoyed a shared lunch with live music and the kids had fun on the playground nearby.  My most exciting purchase was a bag full of fresh, local, organic vegies.  I could have easily bought 2 bags full but I tried to resist.  Lauren even found kohl rabi which she bought one for her dad for father’s day.  How gorgeous is that!


One of our favourites was a bunch of multi coloured carrots which we’ve really enjoyed all week.  The last to be consumed was some purple carrots, so today came the idea of making a carrot cake – with purple carrots!  The recipe is actually based around the Zucchini cake in the “A Taste of Vegetarian” Thermomix cookbook but using carrots, much less sugar, pecans instead of walnuts, and a little honey. Yum!


Chopped Pecans, Dates and Purple Carrots

Carrot, Date and Pecan Cake
70g pecans
100g dates
250g carrots (any colour roughly chopped)
100g sultanas
2 free range eggs
90g grapeseed oil
60g raw or rapadura sugar
80g honey
1 tsp cinnamon
½ tsp salt
210g self raising flour
  • Pre heat oven to 180° and lightly grease a round cake tin (or loaf pan)
  • Place pecans in Thermomix bowl and chop for 10 seconds speed 7 then set aside
  • Place dates in Thermomix bowl and chop for 12 seconds speed 6 and add to pecans
  • Place roughly chopped carrots in Thermomix bowl and chop for 5 seconds speed 5 and add to pecans and dates
  • Place eggs, oil, sugar, honey, cinnamon, salt and sultanas in Thermomix bowl and mix for 10 seconds speed 4
  • Add flour and bowl of pecans, dates and carrots and mix for 25 seconds speed 4
  • Pour into cake pan and bake for 45 minutes or until inserted skewer comes out clean 
Lovely served with a dollop of Greek yoghurt

Enjoy!

Thursday 6 September 2012

Scrumptious Slice – Naughty but Nice


Scrumptious Slice (Triple Chocolate, Almond and Caramel)
When father’s day was looming I asked veggie daddy what sort of cake or sweet treat he would prefer.  Now  he’s usually very predictable – apple cake.  In fact, any variation of apple cake.  But this time his face lit up like a child in a lolly shop and “that chocolately, caramely, nutty slice you made a while back”  was his reply.


Chunks of dark, milk and white chocolate...


And this was a good description as the recipe doesn’t really have a name apart from Scrumptious Slice.  It is based on a slice I had at a cafe whilst I was pregnant with my first born Summer.  I loved it so much that I went out of my way to go back some time later eagerly awaiting more of the same delight.  What started as disappointment when the cafe had none on display turned into satisfaction when the waitress said they had just made a batch and when out the back to cut me a fresh slice.  The things we do when we’re expecting...


Black and Green's Organic 85% dark chocolate
It’s kind of like an upside down triple choc caramel slice and in fact the base and caramel is based on a caramel slice recipe.  The difference and wow factor is that rather than top the caramel with a thin layer of chocolate, chunks of three types of chocolate and roasted almonds are scattered throughout the caramel.  The size of the chocolate and almond chunks can be to your liking but I find around 5mm works well.  I used Black and Green's Organic 85% dark chocolate and Lindt milk and white chocolates.  Simply amazing!

The golden base...
...covered in dark, milk and white chocolate and almonds...
 
Like a caramel slice, a little bit goes a long way and it’s a great treat to share around.  So whatever the occasion, just make it and enjoy!
...covered in caramel and baked until golden

Scrumptious Slice

Base

125g butter cubed
100g self raising flour
60g desiccated coconut
90g brown sugar 

Caramel

400g can condensed milk
2 tbls golden syrup
60g butter cubed

100g each of dark, milk and white chocolate roughly chopped
100g roasted almonds roughly chopped

 
Preheat oven to 180°
Place butter in Thermomix bowl and melt for 2 minutes 70° speed 3
Add flour, coconut and brown sugar and mix for 20-30 seconds at speed 4 scraping down if required
Press into a lined lamington pan (28 x 18cm) and bake at 180° for 15 minutes or until golden
Allow to cool slightly

To make caramel add condensed milk, golden syrup and butter to Thermomix bowl and cook for 5 minutes at 70° on speed 3
Scatter mixed chocolate and nuts over base then drizzle with caramel
Bake immediately for around 15 minutes or until then caramel starts to brown

Allow to cool somewhat if you can resist as the chocolate will be like molten lava and just doesn’t taste as great on a burnt tongue.
 

Enjoy!!
It's hard to resist cutting into it piping hot!

Zucchini, Corn and Ricotta Pancakes

Zucchini, Corn and Ricotta Pancakes
Living near the beach and being an active family, swimming has been a part of our kids' lives since they were each only a few months old.  Summer has been doing lessons since 4 months old and now she’s in the big kids group swimming on her own.  I just can’t believe how well she’s improved in the past few months, swimming proper strokes and diving like a duck.


It’s a busy morning on swimming lesson day but these Zucchini, Corn and Ricotta Pancakes are a perfect pre and post swimming snack for the kids.  They are great as cold finger food for little olds but also serve up delightfully for a light lunch or dinner with chutney and Greek yoghurt.  The chutney we used to day was the delicious Red Hot Apple Chutney that Summer made at kinder for Father’s day.
 

These fritters are high in protein and low in fat with the egg whites and are a great way to disguise veges for fussy kids.  You could substitute 2 whole eggs for the eggs whites and they just wouldn’t be quite as light. I had egg whites left over from making a Custard Tart yesterday and thought this was a healthier option over macaroons or meringue.  While the ricotta adds some protein, using cottage cheese or haloumi instead would boost this even further.

 
Zucchini, Corn and Ricotta Pancakes

4 egg whites
1 spring onion
1 zucchini
100g red capsicum
200g corn kernels
200g flour (I used 1/3 wholemeal)
120g ricotta
Salt & Pepper optional

  • Place egg whites in a clean Thermomix bowl with butterfly attached
  • Whisk for 2-4 minutes 50° speed 4 until no liquid remains then set aside
  • Place spring onion, zucchini and capsicum in bowl (no need to wash between) and chop for 4 seconds speed 6 (you may need to scrape down and repeat for 1 second)
  • Add corn kernels, flour, ricotta and seasoning if using and mix on Reverse 5 seconds speed 4 using spatula if required
  • Add egg whites and mix until only just combined on Reverse 4 seconds speed 3
  • Heat frying pan to moderately hot with a little melted butter
  • Place spoonfuls into fry pan and cook approx 4 minutes or until bubbles just start to pop before flipping and cooking a further 2 minutes

Little fritters make a great sized finger food for little hands!

 
Enjoy!

Saturday 1 September 2012

Orange, Carrot and Date Loaf


Well it’s the first day of spring and we’ve had an amazing day out in the garden.  I tackled the winter weeds especially from the veggie garden.  I then started preparing the soil for new veggie planting now that the masses of wild rocket and rhubarb are coming to an end.  The kids had a great day too and while Summer would plant a new flower in her fairy garden, little Finn would come along and pull them out.  And veggie daddy is on his latest venture.... planning a rather large skateboard ramp in the backyard... stay tuned for that one...
Orange, Carrot and Date Loaf
 
The kids are going crazy about oranges at the moment.  Even veggie daddy who says he wasn’t a fan of oranges on the sporting field as a kid is devouring them.  So I’m buying them by the bag full and enjoying them any way possible.  I also have a large box of fresh dates I bought in bulk.
Orange zest and carrots in the Thermomix
I found this recipe on another great blog called Surprisingly Domestic and tweaked it a little further.  I mainly reduced the sugar as I found the dates add plenty of sweetness and I wanted to let my one year old enjoy it. It’s quite a healthy loaf and the carrots and dates add plenty of flavour and fibre.  It tastes just like spring time and while it’s devine still warm from the oven (we had it for afternoon tea in the garden), it’s also great served with a little yoghurt the next day.

 
Orange, Carrot and Date Loaf

1 orange
100g dates
280g carrots
3 eggs
60g grapeseed oil
130g yoghurt
100g wholemeal flour
200g plain flour
2 tsp baking powder
80g raw sugar
1 tsp cinnamon 
  • Preheat oven to 180°
  • Line a loaf tin with baking paper
  • Remove peel from orange, place in Thermomix and zest 10 seconds speed 9
  • Add carrots and grate 5 seconds speed 5 then set aside
  • Chop dates 5 seconds speed 5 then set aside
  • Remove pith from orange and quarter, place in Thermomix and juice 20 seconds speed 8
  • Add eggs and mix 5 seconds speed 5
  • Add dry ingredients and mix 20 seconds speed 4
  • Add orange zest, carrots and dates and mix 20 seconds speed 4 on Reverse 
  • Pour into loaf tin and bake 180° for 50 minutes
  • Cool 10 minutes in tin before turning out
  • This is a very moist cake so skewer may not come out completely dry
Best served warm or later with yoghurt

Enjoy!