Tuesday, 31 December 2013

Roasted Rhubarb and Ginger Cheesecake


Well it’s time to celebrate!!!  Merry Christmas and Happy New Year for a Happy and Healthy 2014!
And apologies for the lack of recent recipes, I’ve been a little bit unwell for a few months, but in a good way.  Because we’re having another baby!

Roasted Rhubarb and Ginger Cheesecake - a mini version for us to taste test!

 
It all began a few months ago now when I started to sell off my baby gear.  It brought me to tears!  We had always tentatively said two children was enough, the pigeon pair, a boy and a girl.  But when we had a serious discussion it just felt right to have another.  And we’re not getting any younger so it was now or never.
So now here I am, on the brighter side of severe morning / evening sickness and a few daunting tests.  The sun is starting to shine and food is becoming my friend again!
While I still prefer savoury to sweet a special occasion calls for a treat.  We celebrated my parents house warming and my mum’s birthday a few weeks ago and I knew this Rhubarb and Ginger Cheesecake would be just right (inspired by a similar cake I saw on The Great British Bake Off – I’ve never watched so much television as I did in the last few months!)  This cheesecake is not too sweet and best made the day ahead.


Roasting the rhubarb and ginger...


biscuit base pressed in the tin...

swirl the rhubarb through the mix...

bake and voila!
 

Roasted Rhubarb and Ginger Cheesecake

1 bunch or around 5 large stems of rhubarb cut into 1-2 cm pieces

1cm piece of ginger

½ cup orange juice

¼ cup rapadura sugar

200g gingernut biscuits

75g butter

120g raw sugar

500g fresh ricotta

250g cream cheese

250g greek yoghurt

1 tbls cornflour

1 tsp vanilla extract

4 eggs

 
Roasted Rhubarb Puree

·         Place rhubarb, ginger, ¼ cup sugar and orange juice into a baking dish and bake for 20 -30 minutes at 180° or until cooked through and slightly browned

·         Cool slightly then puree in Thermomix bowl for 10 seconds on speed 6 then set aside and wash bowl (note: this puree can be made the day before and is delicious on top of muesli and yoghurt)

Biscuit base

·         Line 24cm springform tin with baking paper or lightly grease

·         Place biscuits in TM bowl and crush for 6 seconds on speed 8 then set aside with no need to clean the bowl

·         Add butter to TM bowl and melt for 3 minutes at 50° on speed 2

·         Return biscuits and mix for 10 seconds on speed 6

·         Place biscuit mix into prepared tin and press down firmly with the assistance of a mug or spatula then place in the fridge while preparing the filling

Cheesecake filling

·         Clean and dry TM bowl thoroughly and preheat oven to 160°

·         Add 120g sugar and mill for 10 seconds on speed 9

·         Insert butterfly and add ricotta, cream cheese, yoghurt, vanilla, eggs and cornflour then mix well for 30 seconds on speed 4 or until mixture is smooth and creamy

·         Pour mixture into base then place spoonfuls of rhubarb puree on top and gently swirl around with the end of a teaspoon

·         Bake for 50 – 60 minutes (apparently a dish of water in oven helps prevent cracking at this stage)

·         Then turn oven off and leave cheesecake to cool slowly for about another hour

·         Once completely cooled (perhaps overnight) remove from tin, serve and enjoy every mouthful!

Saturday, 9 November 2013

Caramelised Sweet Potato, Leek and Feta Ravioli in a Creamy Mushroom Sauce

Don’t you love it when the kids help you prepare dinner – and it works!  And for some strange reason they enjoy eating it even more.


I had a craving for some quality ravioli in a creamy sauce so had this planned as a weekend meal.  We also have some delightful baby leeks in the garden so they added to the inspiration and creamy mushroom sauce.  The result was caramelised sweet potato, leek and feta ravioli in Veggie Daddy’s very child friendly creamy mushroom sauce.  You could serve this with a green side salad or as I did today for a more balanced meal a piece of lightly steamed broccoli on each bowl.

The kids had fun helping roll, fill and press the pasta leading to quite a rustic look.  They soon lost interest in the task at hand after a few batches so they got out their Thermomix made playdough and created their own instead.  But most importantly when it came to dinner we were a pretty happy family with most coming back for more!

Pasta Dough

300g flour
3 free range eggs
Pinch salt

Filling

2 tbls olive oil
400g sweet potato or pumpkin cubed
1 baby leek or ½ large leek finely chopped
80g feta
Pepper to taste

Sauce

1 clove garlic
Approx 6 mushrooms
300g cream
Parmesan cheese or similar to serve

 
  • Place flour, eggs and salt in Thermomix bowl and knead for approx 1 min until dough comes together
  • Wrap in Thermomat or plastic wrap and place in fridge for an hour for gluten to rest

  • Meanwhile make filling by placing oil, sweet potato and leek in a fry pan over a medium heat, cover, stir occasionally, and cook for approx 10 minutes or until pumpkin is softened and slightly browned
  • Place sweet potato mixture in Thermomix bowl with feta and pepper and mix on speed 5 for 20 seconds to combine well.  Set mixture aside and clean bowl for making sauce
  • Remove pasta dough from fridge and cut into 6 pieces.  Keep remaining pieces covered while preparing each batch
  • Roll each piece of dough through a pasta machine at least 10 times.  My pasta machine has settings 1 – 9 and I like to roll to around setting 3 for ravioli into 5cm strips. 

  • Place rolled pasta onto a lightly floured bench, place small spoonfuls of filling halfway along strip then cover with other half.  Press edges together and cut into pieces.  Lightly dust with flour and set aside.  Repeat with remaining dough and filling
  • Bring a large pot of water to boil with a pinch of salt
  • To make sauce place garlic in Thermomix bowl and chop for 3 seconds on speed 6.  Add mushrooms and chop for a further 5 seconds on speed 5.  Sauté at 100° for 5 minutes on speed 1.  Add cream and simmer at 80° for 10 minutes


  • Add batches of ravioli to boiling water ensuring not to overcrowd.  Cook for approx 10 minutes or until cooked to your liking
  • Serve ravioli with mushroom sauce topped with grated cheese

Enjoy!

Wednesday, 30 October 2013

Low Sugar Strawberry Jam


I must admit I’ve had ongoing issues with making jam.  I could never bring myself to use the required amount of sugar to get it to set and never mastered the use of pectin.  But thanks to Jo at Quirky Cooking I’ve found a recipe that’s low in sugar, sets like jelly and most importantly really tastes like strawberries!


And what better way to enjoy them than on our weekend special ricotta hotcakes – made this morning with spelt and flaxseeds.  Veggie daddy said they were the best yet.  After an early morning bike ride to the beach the kids enjoyed them too!


And it's getting into strawberry season so if can grow them or pick them at a berry farm you'll be in for a treat with this yummy jam!

Low Sugar Strawberry Jam

500g strawberries
150g rapadura (or other sweetner)
1 tsp agar agar powder (or 1 tbls of flakes)


 Ensure you have 1-2 clean jars ready and place a saucer in the freezer for testing the jam

·         Place strawberries in Thermomix bowl and chop for 5 seconds on speed 4

·         Add sugar and agar agar and cook for 8 minutes on speed 2 at 100°


·         Test the jam by placing ½ tsp onto cold saucer.  When it is cool push the jam with your finger and it should wrinkle if ready.  If not, cook for a further 2 minutes then retest

·         Puree for a few seconds on speed 8 if a smoother jam if required

·         When ready, pour into 2 clean and rinsed jars, close lids and turn upside down to set for 10 minutes

·         Store in the fridge for 1 month  (if it lasts that long!)

Monday, 21 October 2013

Our Family Favourite Banana Bread


This banana bread is often half eaten before it even leaves the cooling rack.  And is adored by the whole family – just like a bunch of flowers from a lovely friend...
You can use 120g all butter but I find the coconut butter adds a nice lightness to the mix.
delicious straight from the oven.. often half is gone before it leaves the cooling tray!

Our Family Favourite Banana Bread

60g butter
60g coconut butter
70g raw sugar
2 tbls golden syrup
1 tsp vanilla
2 free range eggs
3-4 bananas
½ mc milk
250g SR flour
½ tsp cinnamon
½ tsp bicarb soda

  • Add butters and sugar to Thermomix bowl and cream 10 sec speed 6, scrap down if needed and repeat
  • Add golden syrup, bananas, eggs and vanilla and mix 10 sec speed 4
  • Add flours and milk and mix 10 sec speed 4
  • Bake 180° for 50 min in a lined loaf tin


Thursday, 12 September 2013

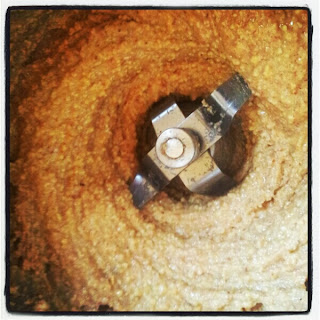
Nut Butter


As fellow Thermomix owners know, once you have this ultimate kitchen appliance, there is literally no way you could live without it.  So on occasions I have sympathy for those without and I make healthy goodies for them.  One on my regular list is whipping up nutritious and delicious jars of nut butter for my sister and niece.  High in protein, a great energy boost for kids, and good enough to eat by the spoon full!

You can use whatever nuts you prefer, roasted or raw, and in whatever quantities.  I use the following because I love almonds, cashews add a creaminess and macadamias are naturally high in oils. 

Apple and Cinnamon Pizza with Nut butter, Maple Syrup and Blueberries
Apart from spreading on fresh bread or toast, nut butters can be used in baking, or in smoothies.  In fact, after making a batch I usually whiz up a high protein banana nut smoothie for the kids to “wash out” the bowl.  So Aunty M your order is awaiting...
Nut butter and banana smoothie

Nut Butter
250g raw almonds
100g cashews
50g macadamias
  • Add nuts to Thermomix bowl and blend for between 1 – 2 minutes on speed 9 depending on your desired consistency
  • Add a tablespoon of grapeseed or other neutral oil if needed
  • Add a tablespoon of coconut oil or rapadura sugar for extra sweetness if desired
  • Keeps well in a jar in the fridge for at least a month


Tuesday, 10 September 2013

Snow


It was an inaugural adventure of the kids first trip to the snow!  Now while it was a humbling experience, far from the snow covered mountains we’d been to pre children in Canada and New Zealand, we all had fun.  A day trip to Lake Mountain with enough snow machine cover for a toboggan run, it was more than enough to introduce the kids to the elements and tire them out.  Our highlight of the day was venturing along a cross country ski track to find some real snow.  Soft and deep, gently covering plants like marshmallow and sinking under your feet as you climbed over it.  We made snowmen and had snow ball fights.  Even if there were only patches of it, this was “real” snow!
Snow fights...
 

Snow angels...


After a hot chocolate and swapping wet gloves we battled a few more toboggan runs.  Then it was time to head down the mountain, farewell the snow, and back to our accommodation in nearby Healesville for a few nights.  Woodbox Retreat was all you could need for a weekend away while being child friendly.  Great kitchen, quality linen covered beds and highlight for the kids was the spa bath, big enough for everyone to fit in!


The following day the adventures continued with a trip to the Healesville Sanctuary.  A relaxed wildlife park with a focus on conservation and protection of animals along with informative shows and keeper talks.  A visit to the animal hospital fuelled Summer’s curiosity about animal care and desire to become a vet some day.


And of course I can’t forget a mention of food.  Healesville is in gourmet food and wine country and we loved our make at home meal of Yarra Valley Pasta topped with a creamy sauce brought to life by a squeeze of lemon from the garden of our accommodation.  We also enjoyed a meal at the renown Innocent Bystander with sourdough bread to take home.  As always I took along plenty of homemade snacks with treats like my Scrumptious Slice (energy laden for an adventure to the snow) and Apricot Coconut Balls which were handy snacks for on the go.

So as it’s now nearing the end of the snow season in Australia you never know what next year will bring.  Perhaps even snow school for the kids at a real mountain!

Tuesday, 13 August 2013

Ezard


While most of my posts are child friendly, home cooked in the thermomix , vegetarian meals, this one is a little different.  It was based on vegetarian food, in fact an 8 course vegetarian degustation meal, however it didn’t involve children (it was our first night away in around 3 years), and it wasn’t home cooked but rather a 2 hat restaurant...
It was simply an amazing night away in Melbourne that Veggie daddy organised as a surprise for my birthday and our 20th anniversary.  And for the sake of staying child friendly, I’d highly recommend it; actually I’d recommend it to anyone!
 
We stayed the night at Crown Metropol, complete with a visit to the infinity pool with 180° views from the 27th floor and late checkout, but the high light was dinner at Ezard.  “E who?” I hear you ask, as I first thought.  Ezard.  A smallish restaurant tucked underground in Flinders Lane known by it’s reputation not bright light.  With the need to book in advance the reason is clear... With impressionable service and knowledge of staff the evening is all about you and the food you consume.  And yes it is simply amazing food.  While there is a choice of  a la carte or degustation ( both meat and veggie options) I recommend the later simply for the range of palatable experiences.  Especially when topped off by the dessert tasting plate... Heaven.
 Couldn't help myself to take photos to share the memories!
 

We started with locally made bread served with house made Parmesan, garlic and rosemary oil with chilli salt and Szechwan pepper.  Rather sweet than spicy.  Followed by...

 
pumpkin and ginger soup with coconut cream and tofu and wasabi shooter

salad of heirloom beetroot and carrot, asparagus, parmesan custard, hazelnuts, white truffle vinaigrette

steamed spiced tofu with chilli, fragrant oils and crispy sweet potato
soft white polenta with sauteed mushrooms, peas, poached egg, parmesan crisp, truffle oil
I missed the photo of
sesame rice noodle roll with asian mushrooms, soy mirin broth, black bean crumbs
 
caramelised eggplant, tomato and lime salad, yellow curry dressing and fragrant jasmine rice
 
handmade potato gnocchi, manchego cheese, dried black olive, cauliflower, raisins and toasted brioche crumble
 

palate cleanser
ezard dessert tasting plate to share

And while absence makes the heart grow fonder and we missed our little cherubs dearly, we agreed that time out really is of benefit for the kids (or was it that they were spoilt at Grandmas!)
 

Wednesday, 31 July 2013

Veggie Pasties with Puff Pastry

I can’t stop eating them!  This afternoon I had a brain wave of what to cook for dinner tonight – something we haven’t had for quite some time – veggie pasties.  Question was, do I use frozen puff pastry or make it myself which I’ve never attempted before.  Well it became the latter and now I’m never looking back.  These pasties were delicious and now I’m sitting here eating them cold and they’re just as amazing (trying to ignore the fact of how much butter there is in them!)
Veggie Pasties with Puff Pastry

So this is actually a Rough Puff Pastry as it’s a cheats version of combining the butter with the flour, made simply with the Thermomix rather than rubbing by hand, as opposed to a true puff pastry which has each layer of dough brushed with butter during the folding process.  According to Julia Child in Mastering the Art of French Cooking, the number of layers can vary from 73 to 730 depending on outcome required.  A formula used to calculate this is (f +1)n where  f is the number of folds, and n the number of times the dough has been folded.  For example, twice folding 4 times (2 +1)4 = 81 layers or as I did twice folding 6 times (2 +1)6 = 729.
Flaky layers of buttery pastry...
Science aside the ingredients of your pastie but be left up to your imagination (or fridge and season availability).  And remember the key is to keep your pastry ingredients cold to retain the puff.   So don’t put it in the too hard basket give it a try and enjoy!

Rough Puff Pastry
250g plain flour
Pinch of salt
200g cold butter cubed
1 tbls lemon juice
100g iced water kept in fridge (1 MC)

  • Place flour and salt in Thermomix bowl and pulse twice to sieve
  • Add butter, lemon juice and cold water and set to Closed Lid Position and knead for 10-20 seconds.  If required add a little more water until it just comes together and knead for an extra 10 seconds
  • Turn out into a cold lightly floured bench or thermomat and gently bring together into a large rectangle by hand.  Dough may still look marbled by butter
  • Lightly roll with rolling pin to about 1cm thick then fold short ends to center
  • Lightly roll out again and fold repeating a total of 4 -6 times until dough is smooth and butter has become more blended.
  • Wrap in cling wrap or thermomat and refrigerate for around an hour while you prepare your filling ingredients
folding the pastry to the center before rolling out again...


Pastie Filling

50g tasty or gyuere cheese cubed
1 onion
1 clove garlic
Olive oil
2 small or 1 large potato cubed
Approx 150g cauliflower roughly chopped
1 carrot roughly chopped
1 silverbeet leaf
150g cooked green or brown lentils
1 MC frozen peas
1 MC corn kernels
1 tsp TM veggie stock
1 tsp curry powder
1 tsp mixed dried herbs

  • Place  cheese in Thermomix bowl and chop for 3 seconds on speed 5 then remove and set aside
  • Place onion and garlic in bowl the chop for 3 seconds on speed 5 and scrape down
  • Add a splash of olive oil and cook for 3 minutes on 100° speed 3
  • Add potato, carrot, cauliflower and silver beet and set to Closed Lid Position and press Turbo 2-3 times until finely chopped but being careful not to overchop
  • Add lentils, peas, corn, curry powder and herbs and cook for 8 minutes on 100° speed 1 Reverse
  • Add cheese and mix for 3 seconds on speed 3 Reverse
  • Allow to cool while continuing with pastry
  • Preheat oven to 220°
  • Remove dough from fridge and cut 5cm pieces to lightly roll out with rolling pin to around 0.5cm
  • Trace a 10cm bowl into a circle and set aside to fill

cutting out circles for the pasties...
  • Repeat with remaining dough and finally combing left over pieces also
  • Place filling on 1 side of each circle, fold over pastry and pinch edges together
    filling before folding the pasties...
  • Brush with beaten egg and place on a baking tray
  • Bake for 25-30 minutes or until puffed and golden
 

Wednesday, 24 July 2013

bliss


check out this awesome photo my 4 year old daughter took of a piece if jigsaw puzzle then accidently uploaded to my blog.  Simply bliss...

Super Healthy Protein Muffins

I have so many recipes on my list to write about but this one just jumped the queue.  A tasty treat that ticks all the right boxes.  It’s healthy (high in protein, fibre and even omega 3’s), low allergy (nut free, dairy free, egg free), child friendly (low in sugar, bright in colour) and like most muffins is really quick to make especially in a Thermomix.  And what’s most important is the kids keep coming back for more!


Super Healthy Protein Muffins
It started as a quest for healthy carrot cake muffins to make for a last minute morning tea gathering to find no carrots in the fridge.  But I found a beetroot and a zucchini calling out to me.  I was also on a tofu craving (which I strangely often get) so with a little Google searching I found the idea of using silken tofu as a replacement for the liquid component of healthy muffins.  So it really is a hidden goodness muffin with protein from the tofu, fibre from the veggies (you could use carrots instead but who can resist the colour from the beetroot), and omega 3s from the chia seeds.


Nothing better than licking the batter...


Call the savoury, call them sweet, just try them or your own version and you can call them whatever you like.


Super Healthy Protein Muffins
Zest and juice from one orange
½ tsp cinnamon
½ tsp nutmeg
50g rapadura sugar
1 beetroot peeled and roughly chopped
1 zucchini roughly chopped
300g silken tofu
1 tbls chia seeds
60g grapeseed or other light flavoured oil
150g wholemeal flour
150g plain flour
2 tsp baking powder

  • Preheat oven to 180° and grease 12 large hole muffin tray or 24 small (or use silicon cupcake liners)
  • Place orange peel into Thermomix bowl and zest on speed 9 for 10 seconds or until finely chopped
  • Add cinnamon, nutmeg, sugar, beetroot and zucchini and chop for 4 seconds on speed 5
  • Add tofu, chia seeds, orange juice and oil and mix for 10 seconds on speed 4
  • Add flours and mix until just combined – around 5 seconds on speed 4
  • Pour into muffin trays and bake for 25 minutes or until muffins spring back when pressed

Enjoy!


Little Finn after a long walk and a piggy back home...