Friday, 24 January 2014

Berry delicious ice cream

Berry delicious icecream with a hazelnut tuile
A delicious summer time treat for the whole family that will even impress your visitors.  Sugar free, dairy free, egg free, additive free.  Naturally sweetened by the coconut milk and bananas  - both also make it nice and creamy compared to a sorbet.  You can substitute any berry or even mango and swap the coconut milk for yoghurt.  It’s the kind of treat the kids will even lick the bowl for!

must be good ... don't mind the pink skirt on little Finn!

Berry delicious ice cream
1 tin coconut milk – frozen in icecube tray
2 large bananas chopped into pieces and frozen
200g frozen berries (blueberries and raspberries are nice)
1 mc orange juice
  • Freeze coconut milk and fruit a day ahead
  • Place frozen coconut milk in Thermomix bowl and blend for 10 seconds on speed 9 scraping down as needed
  • Add bananas, berries and juice and blend for a further 20 seconds or until well combined scraping down as required
  • Serve topped with fresh berries and perhaps a little not so healthy treat or garnish on the side


Wednesday, 8 January 2014

Chocolate Quinoa Cupcakes with Raspberry Cream Cheese Icing

Chocolate Quinoa Cupcakes with Raspberry Cream Cheese Icing
It’s berry season again and we’ve found a new local berry farm with an amazing range of delightful berries.  It’s Raven’s Creek Farm in Moriac and while they mainly have raspberries they also have loganberries, silvanberries, blackberries, youngberries and more!  They’re easy to pick and it’s makes a fun day out for the kids especially with the gorgeous little cafe which has great coffee, sweet and savoury treats and a produce store.  It’s only around 15 minutes from our home so I can see we’re going to enjoy the season!
the kids loved the raspberries best...
So with fresh berries galore and some free range roadside eggs I had a great idea to trying my new recipe discovery... Chocolate quinoa cake.  And with a 2 year old morning tea birthday party tomorrow I thought I’d turn them into Chocolate Quinoa cupcakes topped with raspberry cream cheese icing and a pretty raspberry on top.  Simply delightful.
a mixture of fresh berries...
Chocolate Quinoa Cupcakes with Raspberry Cream Cheese Icing

2/3 cup quinoa (well rinsed to remove bitterness)
1 ½ cups of water
100g raw or rapadura sugar
120g butter or coconut oil
1 tsp vanilla essence
4 free range eggs
80g milk or coconut milk
80g cocoa powder
1 ½ tsp baking powder
½ tsp salt
  • Rinse quinoa well to remove bitterness.  I’m using the lovely Mt Zero Australian Organic Quinoa at the moment.
  • Place quinoa and water in a saucepan and bring to boil.  Then reduce to a simmer for around 15 minutes until the tails have fallen off and remove from heat to cool.  (or steam in your Thermomix)
  • Grease muffin tins or use silicon moulds.  ( I found this mix made 12 medium and 12 mini cupcakes so I’m guessing it would make about 12 large ones)
  • Preheat oven to 180° C
  • Place sugar, butter and vanilla in Thermomix bowl and cream for 10 seconds on speed 6
  • Add eggs and milk and mix for a further 10 seconds on speed 4
  • Add cooled quinoa, cocoa, baking powder and salt and mix for a final 20 seconds on speed 4 scraping down if needed
  • Spoon into tins and bake for 20 minutes for smaller cupcakes or 30 minutes for larger (or until they spring back when touched)

Raspberry Cream Cheese Icing

200g cream cheese
50g butter
Punnet of fresh or frozen raspberries
  • Place all ingredients in Thermomix and blend or 10 seconds on speed 4
  • Allow to cool in fridge for around 10 minutes before spreading over cooled cupcakes and decorating with a fresh raspberry on top


Tuesday, 31 December 2013

Roasted Rhubarb and Ginger Cheesecake


Well it’s time to celebrate!!!  Merry Christmas and Happy New Year for a Happy and Healthy 2014!
And apologies for the lack of recent recipes, I’ve been a little bit unwell for a few months, but in a good way.  Because we’re having another baby!

Roasted Rhubarb and Ginger Cheesecake - a mini version for us to taste test!

 
It all began a few months ago now when I started to sell off my baby gear.  It brought me to tears!  We had always tentatively said two children was enough, the pigeon pair, a boy and a girl.  But when we had a serious discussion it just felt right to have another.  And we’re not getting any younger so it was now or never.
So now here I am, on the brighter side of severe morning / evening sickness and a few daunting tests.  The sun is starting to shine and food is becoming my friend again!
While I still prefer savoury to sweet a special occasion calls for a treat.  We celebrated my parents house warming and my mum’s birthday a few weeks ago and I knew this Rhubarb and Ginger Cheesecake would be just right (inspired by a similar cake I saw on The Great British Bake Off – I’ve never watched so much television as I did in the last few months!)  This cheesecake is not too sweet and best made the day ahead.


Roasting the rhubarb and ginger...


biscuit base pressed in the tin...

swirl the rhubarb through the mix...

bake and voila!
 

Roasted Rhubarb and Ginger Cheesecake

1 bunch or around 5 large stems of rhubarb cut into 1-2 cm pieces

1cm piece of ginger

½ cup orange juice

¼ cup rapadura sugar

200g gingernut biscuits

75g butter

120g raw sugar

500g fresh ricotta

250g cream cheese

250g greek yoghurt

1 tbls cornflour

1 tsp vanilla extract

4 eggs

 
Roasted Rhubarb Puree

·         Place rhubarb, ginger, ¼ cup sugar and orange juice into a baking dish and bake for 20 -30 minutes at 180° or until cooked through and slightly browned

·         Cool slightly then puree in Thermomix bowl for 10 seconds on speed 6 then set aside and wash bowl (note: this puree can be made the day before and is delicious on top of muesli and yoghurt)

Biscuit base

·         Line 24cm springform tin with baking paper or lightly grease

·         Place biscuits in TM bowl and crush for 6 seconds on speed 8 then set aside with no need to clean the bowl

·         Add butter to TM bowl and melt for 3 minutes at 50° on speed 2

·         Return biscuits and mix for 10 seconds on speed 6

·         Place biscuit mix into prepared tin and press down firmly with the assistance of a mug or spatula then place in the fridge while preparing the filling

Cheesecake filling

·         Clean and dry TM bowl thoroughly and preheat oven to 160°

·         Add 120g sugar and mill for 10 seconds on speed 9

·         Insert butterfly and add ricotta, cream cheese, yoghurt, vanilla, eggs and cornflour then mix well for 30 seconds on speed 4 or until mixture is smooth and creamy

·         Pour mixture into base then place spoonfuls of rhubarb puree on top and gently swirl around with the end of a teaspoon

·         Bake for 50 – 60 minutes (apparently a dish of water in oven helps prevent cracking at this stage)

·         Then turn oven off and leave cheesecake to cool slowly for about another hour

·         Once completely cooled (perhaps overnight) remove from tin, serve and enjoy every mouthful!

Saturday, 9 November 2013

Caramelised Sweet Potato, Leek and Feta Ravioli in a Creamy Mushroom Sauce

Don’t you love it when the kids help you prepare dinner – and it works!  And for some strange reason they enjoy eating it even more.


I had a craving for some quality ravioli in a creamy sauce so had this planned as a weekend meal.  We also have some delightful baby leeks in the garden so they added to the inspiration and creamy mushroom sauce.  The result was caramelised sweet potato, leek and feta ravioli in Veggie Daddy’s very child friendly creamy mushroom sauce.  You could serve this with a green side salad or as I did today for a more balanced meal a piece of lightly steamed broccoli on each bowl.

The kids had fun helping roll, fill and press the pasta leading to quite a rustic look.  They soon lost interest in the task at hand after a few batches so they got out their Thermomix made playdough and created their own instead.  But most importantly when it came to dinner we were a pretty happy family with most coming back for more!

Pasta Dough

300g flour
3 free range eggs
Pinch salt

Filling

2 tbls olive oil
400g sweet potato or pumpkin cubed
1 baby leek or ½ large leek finely chopped
80g feta
Pepper to taste

Sauce

1 clove garlic
Approx 6 mushrooms
300g cream
Parmesan cheese or similar to serve

 
  • Place flour, eggs and salt in Thermomix bowl and knead for approx 1 min until dough comes together
  • Wrap in Thermomat or plastic wrap and place in fridge for an hour for gluten to rest

  • Meanwhile make filling by placing oil, sweet potato and leek in a fry pan over a medium heat, cover, stir occasionally, and cook for approx 10 minutes or until pumpkin is softened and slightly browned
  • Place sweet potato mixture in Thermomix bowl with feta and pepper and mix on speed 5 for 20 seconds to combine well.  Set mixture aside and clean bowl for making sauce
  • Remove pasta dough from fridge and cut into 6 pieces.  Keep remaining pieces covered while preparing each batch
  • Roll each piece of dough through a pasta machine at least 10 times.  My pasta machine has settings 1 – 9 and I like to roll to around setting 3 for ravioli into 5cm strips. 

  • Place rolled pasta onto a lightly floured bench, place small spoonfuls of filling halfway along strip then cover with other half.  Press edges together and cut into pieces.  Lightly dust with flour and set aside.  Repeat with remaining dough and filling
  • Bring a large pot of water to boil with a pinch of salt
  • To make sauce place garlic in Thermomix bowl and chop for 3 seconds on speed 6.  Add mushrooms and chop for a further 5 seconds on speed 5.  Sauté at 100° for 5 minutes on speed 1.  Add cream and simmer at 80° for 10 minutes


  • Add batches of ravioli to boiling water ensuring not to overcrowd.  Cook for approx 10 minutes or until cooked to your liking
  • Serve ravioli with mushroom sauce topped with grated cheese

Enjoy!

Wednesday, 30 October 2013

Low Sugar Strawberry Jam


I must admit I’ve had ongoing issues with making jam.  I could never bring myself to use the required amount of sugar to get it to set and never mastered the use of pectin.  But thanks to Jo at Quirky Cooking I’ve found a recipe that’s low in sugar, sets like jelly and most importantly really tastes like strawberries!


And what better way to enjoy them than on our weekend special ricotta hotcakes – made this morning with spelt and flaxseeds.  Veggie daddy said they were the best yet.  After an early morning bike ride to the beach the kids enjoyed them too!


And it's getting into strawberry season so if can grow them or pick them at a berry farm you'll be in for a treat with this yummy jam!

Low Sugar Strawberry Jam

500g strawberries
150g rapadura (or other sweetner)
1 tsp agar agar powder (or 1 tbls of flakes)


 Ensure you have 1-2 clean jars ready and place a saucer in the freezer for testing the jam

·         Place strawberries in Thermomix bowl and chop for 5 seconds on speed 4

·         Add sugar and agar agar and cook for 8 minutes on speed 2 at 100°


·         Test the jam by placing ½ tsp onto cold saucer.  When it is cool push the jam with your finger and it should wrinkle if ready.  If not, cook for a further 2 minutes then retest

·         Puree for a few seconds on speed 8 if a smoother jam if required

·         When ready, pour into 2 clean and rinsed jars, close lids and turn upside down to set for 10 minutes

·         Store in the fridge for 1 month  (if it lasts that long!)

Monday, 21 October 2013

Our Family Favourite Banana Bread


This banana bread is often half eaten before it even leaves the cooling rack.  And is adored by the whole family – just like a bunch of flowers from a lovely friend...
You can use 120g all butter but I find the coconut butter adds a nice lightness to the mix.
delicious straight from the oven.. often half is gone before it leaves the cooling tray!

Our Family Favourite Banana Bread

60g butter
60g coconut butter
70g raw sugar
2 tbls golden syrup
1 tsp vanilla
2 free range eggs
3-4 bananas
½ mc milk
250g SR flour
½ tsp cinnamon
½ tsp bicarb soda

  • Add butters and sugar to Thermomix bowl and cream 10 sec speed 6, scrap down if needed and repeat
  • Add golden syrup, bananas, eggs and vanilla and mix 10 sec speed 4
  • Add flours and milk and mix 10 sec speed 4
  • Bake 180° for 50 min in a lined loaf tin


Thursday, 12 September 2013

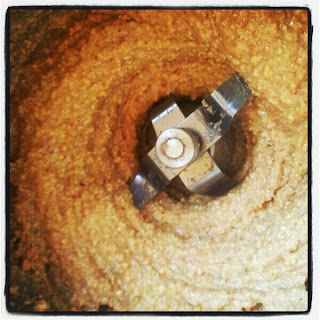
Nut Butter


As fellow Thermomix owners know, once you have this ultimate kitchen appliance, there is literally no way you could live without it.  So on occasions I have sympathy for those without and I make healthy goodies for them.  One on my regular list is whipping up nutritious and delicious jars of nut butter for my sister and niece.  High in protein, a great energy boost for kids, and good enough to eat by the spoon full!

You can use whatever nuts you prefer, roasted or raw, and in whatever quantities.  I use the following because I love almonds, cashews add a creaminess and macadamias are naturally high in oils. 

Apple and Cinnamon Pizza with Nut butter, Maple Syrup and Blueberries
Apart from spreading on fresh bread or toast, nut butters can be used in baking, or in smoothies.  In fact, after making a batch I usually whiz up a high protein banana nut smoothie for the kids to “wash out” the bowl.  So Aunty M your order is awaiting...
Nut butter and banana smoothie

Nut Butter
250g raw almonds
100g cashews
50g macadamias
  • Add nuts to Thermomix bowl and blend for between 1 – 2 minutes on speed 9 depending on your desired consistency
  • Add a tablespoon of grapeseed or other neutral oil if needed
  • Add a tablespoon of coconut oil or rapadura sugar for extra sweetness if desired
  • Keeps well in a jar in the fridge for at least a month